Getting started
Introduction
Welcome to the OpenDevStack. The OpenDevStack is a framework to help in setting up a project infrastructure and continuous delivery processes on OpenShift and Atlassian toolstack with one click. This guide shall help you to setup the OpenDevStack, so you can work with it and test it in a local environment setup. The steps for the setup can also be adapted for running the OpenDevstack with an existing OpenShift installation or to connect it with your Atlassian tools, if you use Atlassian Crowd as SSO provider.
Important: The credentials provided in the guide are only meant to be used within the local test installation. For use in production you will have to customize paths, URLs and credentials!
Requirements
The following requirements have to be met to setup a local environment. You should have a computer with at least 32 GB of RAM, because we are going to install several Atlassian tools and a local OpenShift environment.
Important: We assume, you will have a full functional internet connection
Git
We use Git as code repository, so you have to be familiar to work with Git.
Vagrant
The OpenDevStack uses Vagrant to provide a sample infrastructure for the Atlassian tools, Rundeck and a so called Ansible controller, a VM, where you can run Ansible scripts against the Atlassian VM. It is recommended to use the latest Vagrant version available from the HashiCorp Vagrant page.
Virtualbox
Vagrant uses Virtualbox for running the provisioned VMs. Therefore you must have Virtualbox installed.
Atlassian tools licenses
To use the Atlassian tools you need a license to run them. For testing and evaluation Atlassian provides evalutation licenses, which you can get on the My Atlassian license page. Here you have to keep in mind, that you have to register, if you don’t have an Atlassian account. The registration is for free. You need licenses for the following products:
-
Bitbucket
-
Jira
-
Confluence
-
Crowd
The evaluation licenses are valid for 30 days from the date of purchase. If you need a server id, this will be provided by the tools within the installation, so you are able to inlcude the licenses within theinstallation wizards of the tools, after the base setup provided by the Ansible scripts.
The base setup uses the following versions:
| Software | Version |
|---|---|
Bitbucket |
5.16.3 |
Jira |
7.13.3 |
Confluence |
6.14.3 |
Crowd |
3.4.4 |
Cygwin / Linux
You must have the possibility to run bash scripts to install the OpenDevStack. On Linux systems you can use these scripts out-of-the box, on Windows systems you will have to install either a bash port for Windows like Cygwin. For Windows, our recommendation is to use Cygwin for configuration. Make sure to select the curl package under the "net" category when installing cygwin.
Ansible
The OpenDevStack uses Ansible to install and configure the necessary software for the enabling stack, so it’s recommended to get familiar with its core concepts and usage. Credentials are stored within an Ansible vault, so even if you commit them in a public repository they are not available unless you know the vault password. Nevertheless, it is recommended to take care with handling credentials, even if they are encrypted.
Setup your local environment
From now on we assume, you work from a Bash (Cygwin / Linux).
Tailor
We use tailor to handle our versioned OpenShift templates and keep our cluster in sync. Please see its installation instructions for your platform. The following lists the version requirements:
| OpenDevStack version | Tailor version |
|---|---|
0.1.x |
= 0.8 |
1.0.x |
>= 0.9.1 |
1.1.x |
>= 0.9.3 |
Prepare infrastructure
First create a base directory for the OpenDevStack repositories, e.g. ods. This will be your base directory for all following operations. This path will also be mounted to the VMs provisioned by Vagrant.
Then you have to clone the ods-core repository into the created directory.
git clone https://github.com/opendevstack/ods-core.git
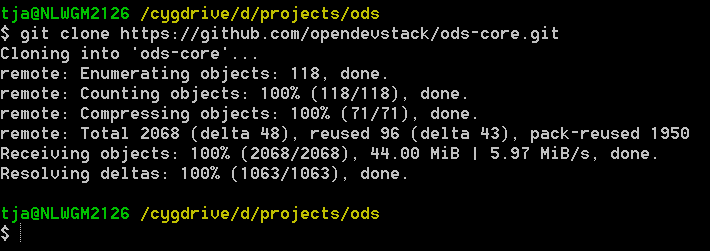
Navigate to the folder .
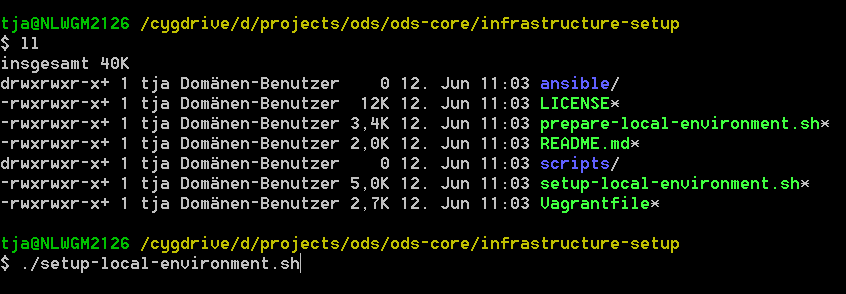
There you will find the setup and configuration shell scripts. You can start the infrastructure provisioning and setup by using
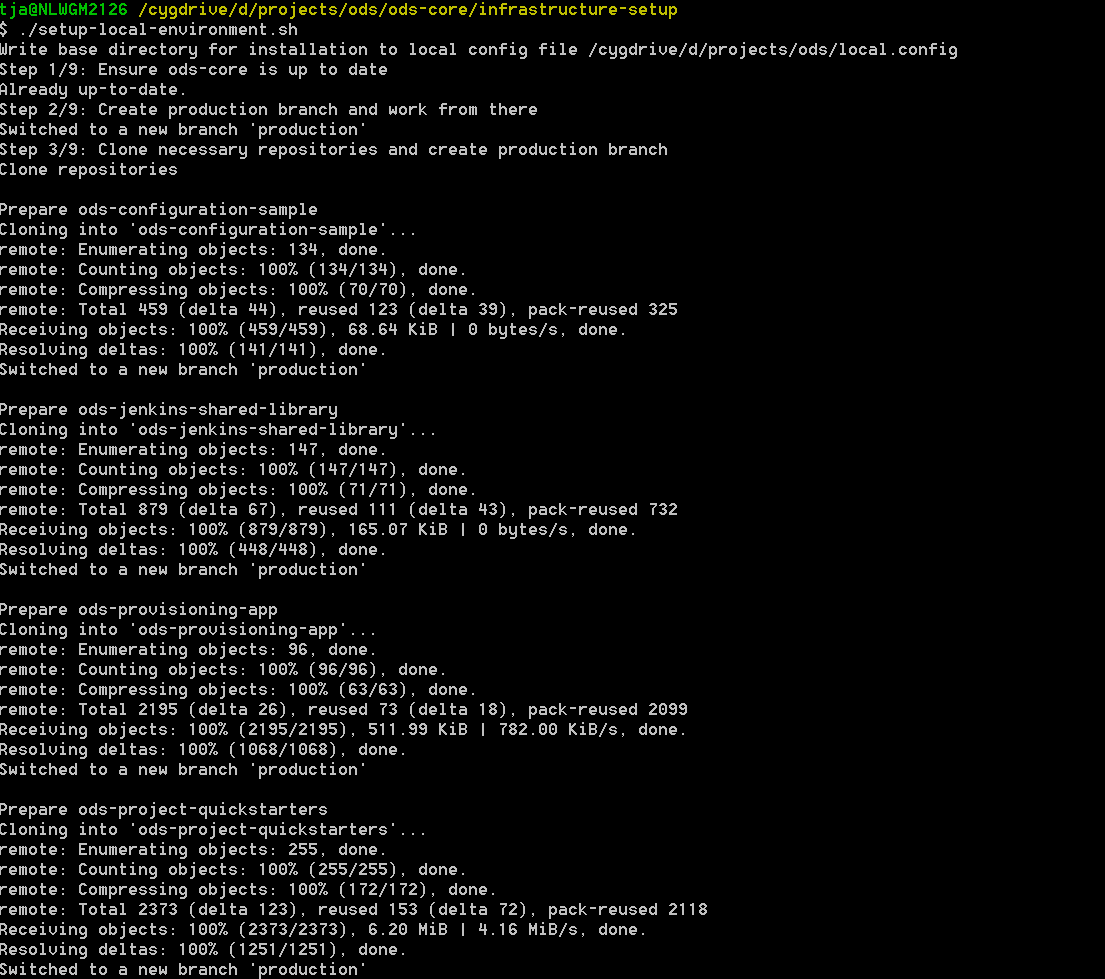
./setup-local-environment.shThis script allows you to set the necessary installation pathes, clones the necessary OpenDevStack repositories and prepares the vagrant infrastructure, including the base installation of the Atlassian tools, Rundeck and datatbase preparing.
For a local test environment it is recommended to keep the default values.
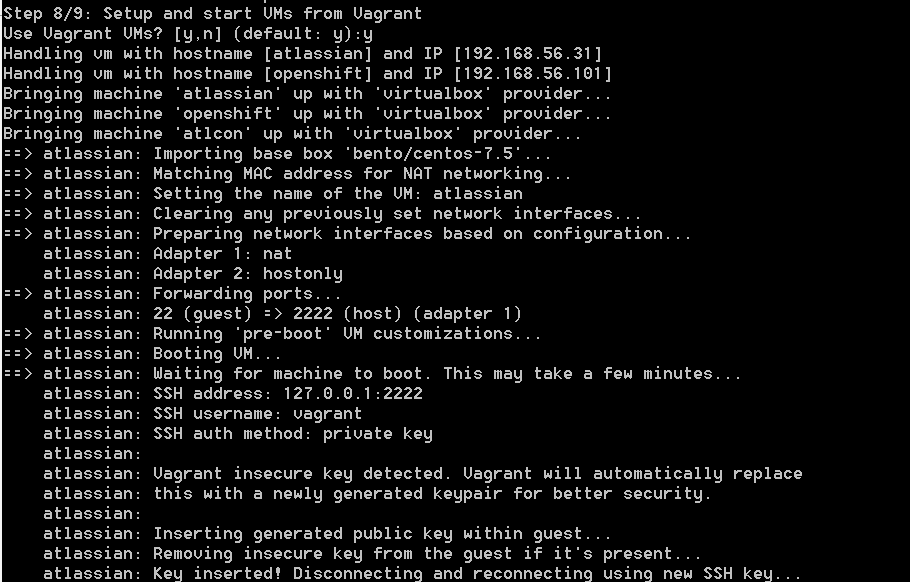
During script execution you will have the possibility to choose, if you want to confirm the Atlassian and Rundeck installation for every tool or to run a complete setup.

After the base installation, you will have to configure the Atlassian tools, before you are able to proceed.

Configure Atlassian Tools
The following steps explain the Atlassian tools configuration i the local test environment. If you have already installed the Atlassian tools, you can skip the Configuration Wizard chapter for the respective tool
Atlassian Crowd
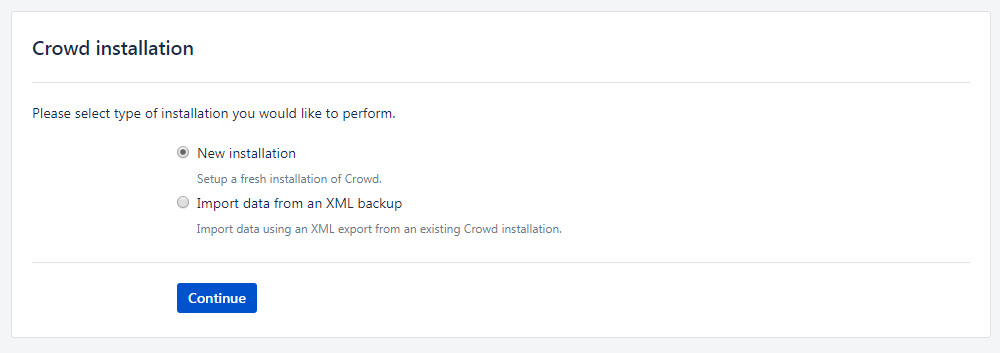
Run Configuration Wizard
Be patient. First time accessing this page will take some time.
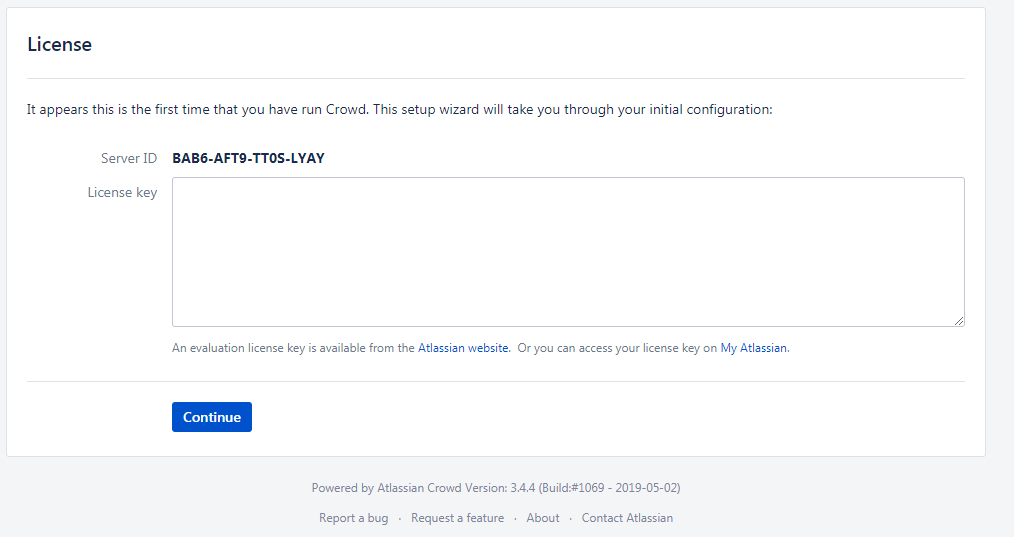
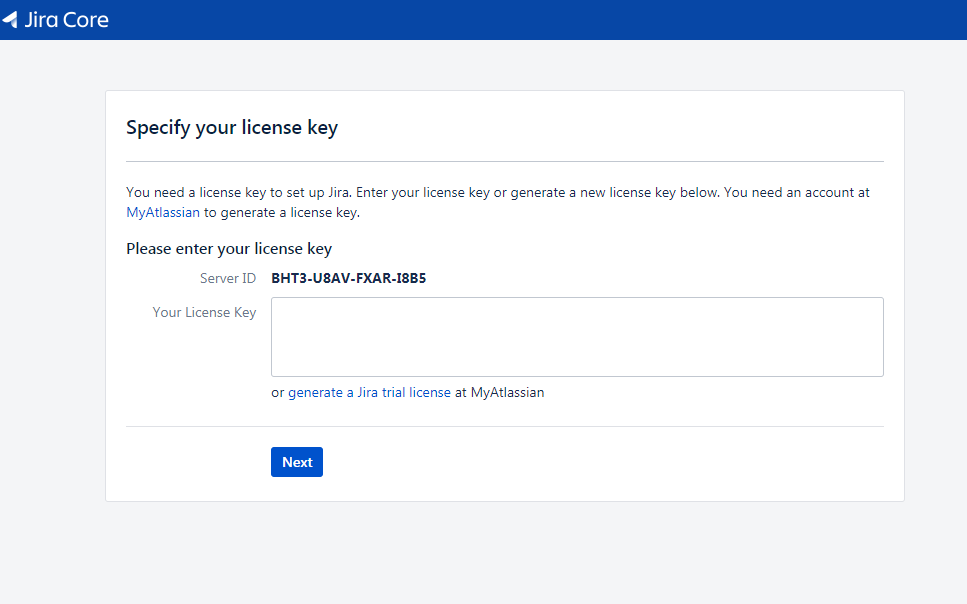
Step 1: License key
Here you can see the server id you need for the license you can get from the My Atlassian page. Use the link to get an evaluation license (Crowd Server) or enter a valid license key into the textbox.
Step 3: Database Configuration
The next step is the database configuration.
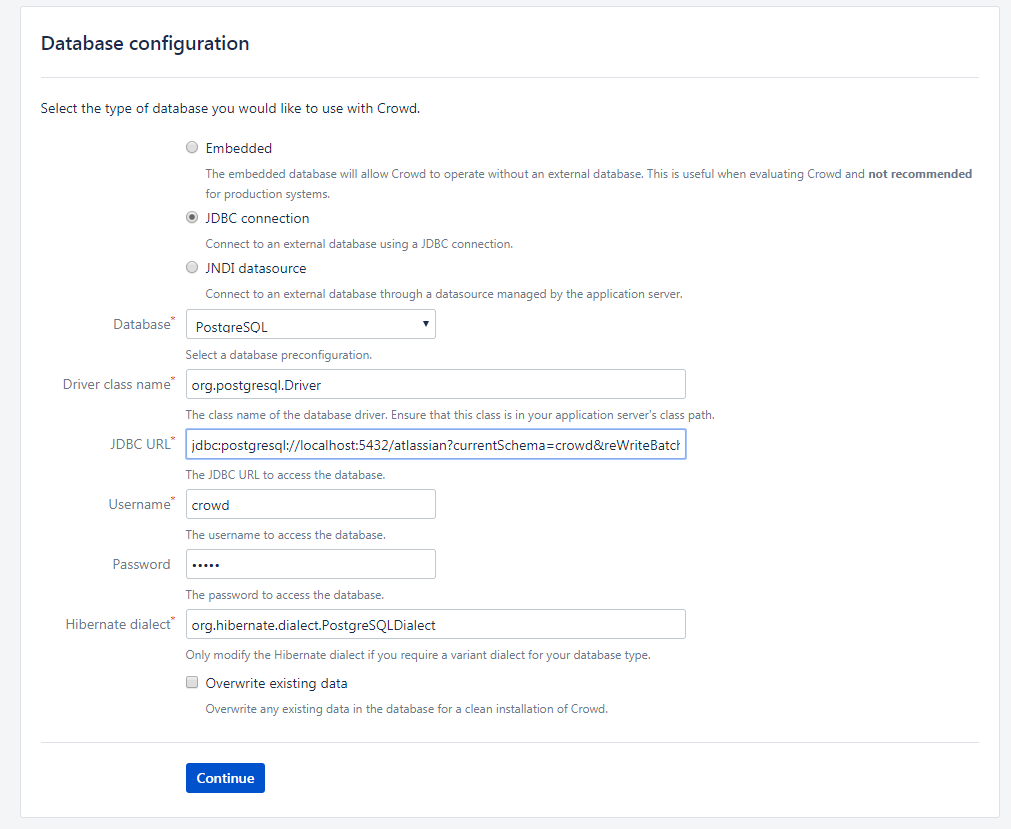
Choose the JDBC Connection option and configure the database with the following settings
| Option | Value |
|---|---|
Database |
PostgreSQL |
Driver class name |
org.postgresql.Driver |
JDBC URL |
jdbc:postgresql://localhost:5432/crowd?reWriteBatchedInserts=true&prepareThreshold=0 |
Username |
crowd |
Password |
crowd |
Hibernate dialect |
org.hibernate.dialect.PostgreSQLDialect |
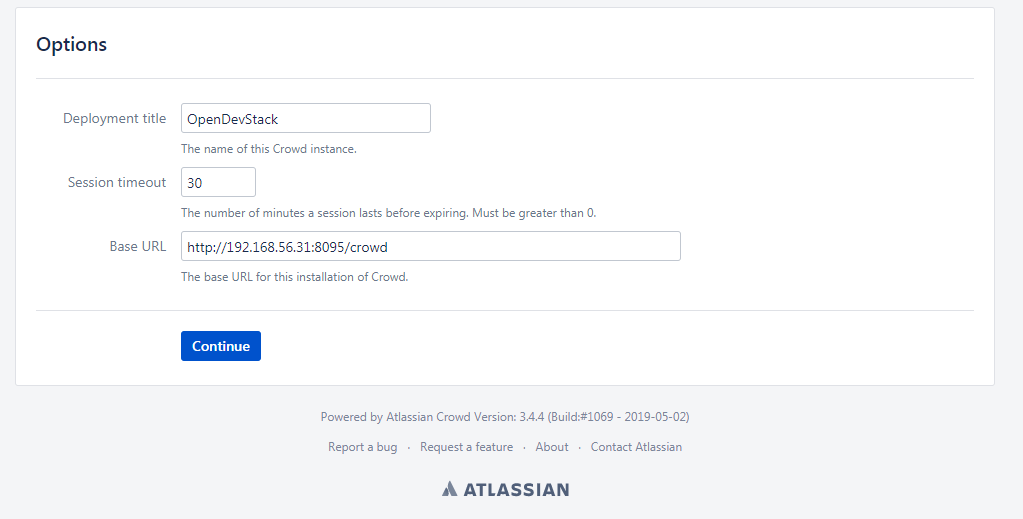
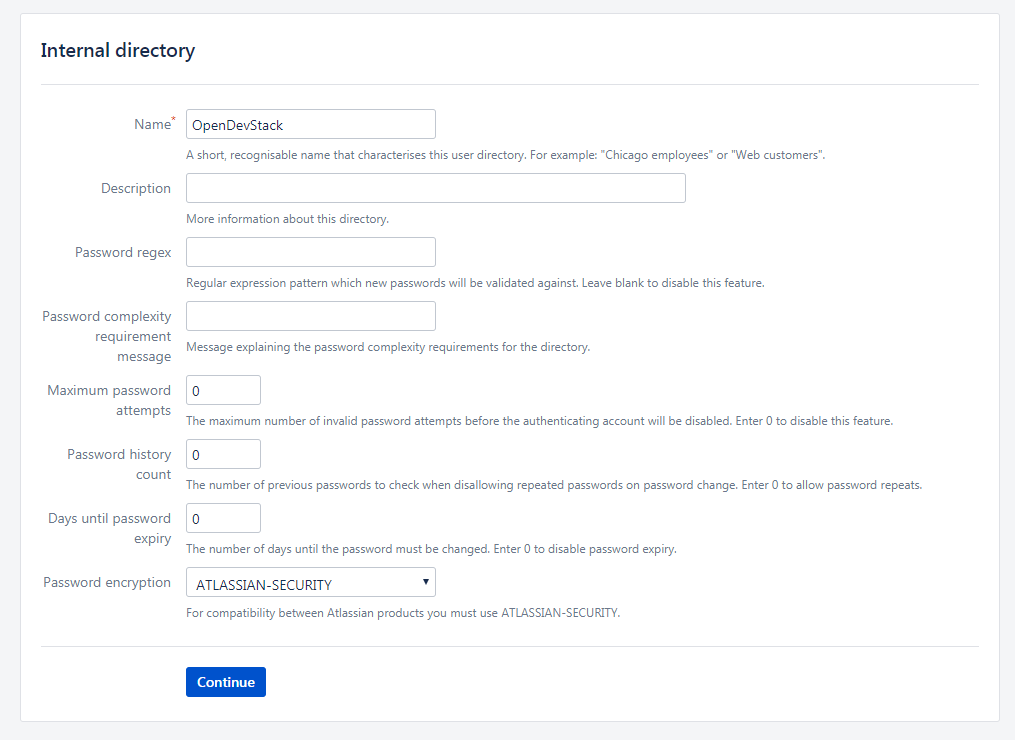
Step 4: Options
Choose a deployment title, e.g. OpenDevStack and set the Base URL to http://192.168.56.31:8095/crowd


Configure Crowd
You will have to configure crowd to enable the Atlassian tools and Rundeck to login with crowd credentials.
The following paragraphs assume, that you are logged in to the Crowd console.
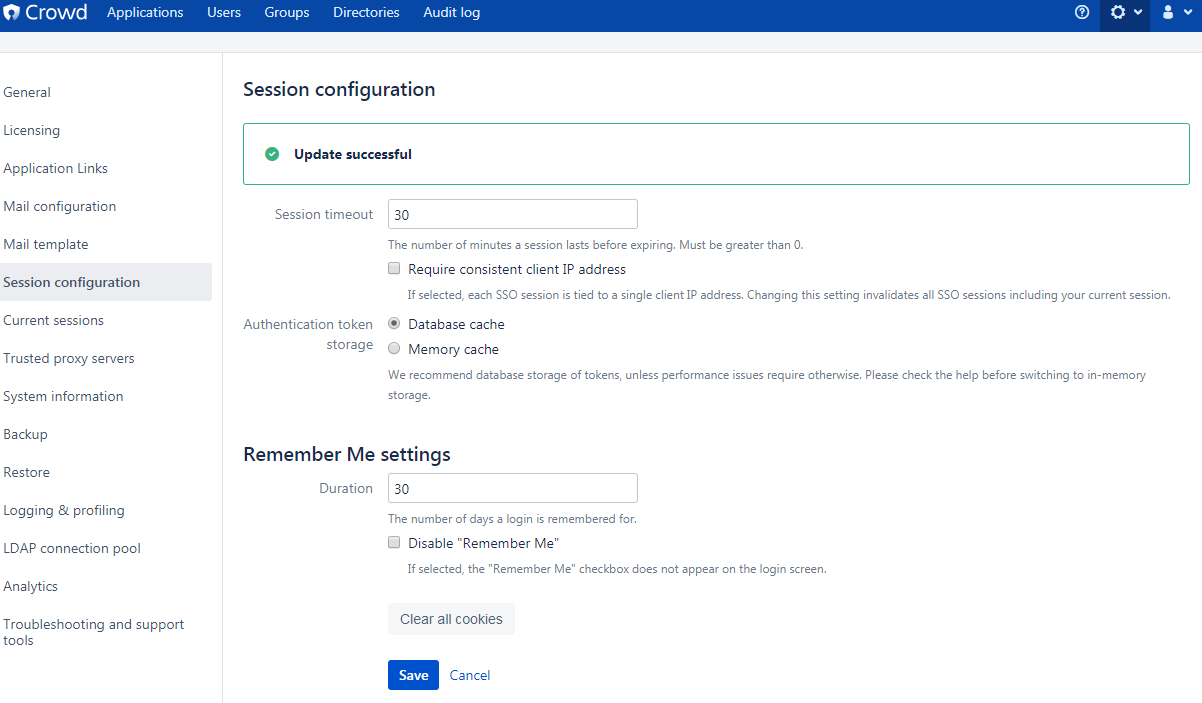
Session configuration
You will have to change the default session configuration.
Open the Administration menu and choose the Session configuration entry.
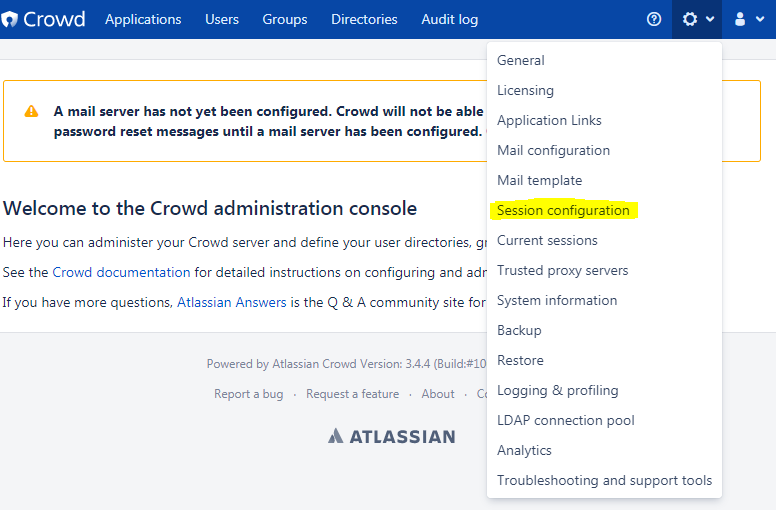
Uncheck the Require consistent client IP address checkbox.
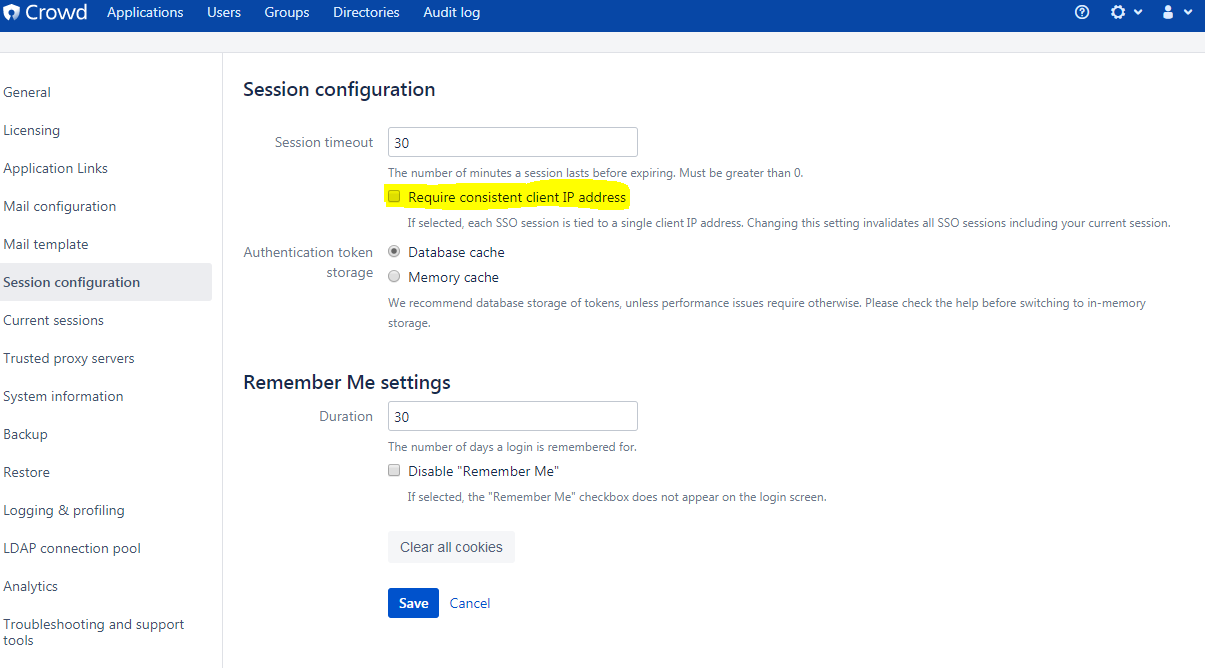
Click save and login again.
Add OpenDevStack groups
You will have to add additional groups Crowd’s internal directory. The groups are listed in the table below.
| Group | Description |
|---|---|
opendevstack-users |
Group for normal users without adminstration rights |
opendevstack-administrators |
Group for administration users |
To add a group, open the Groups tab and choose Add group
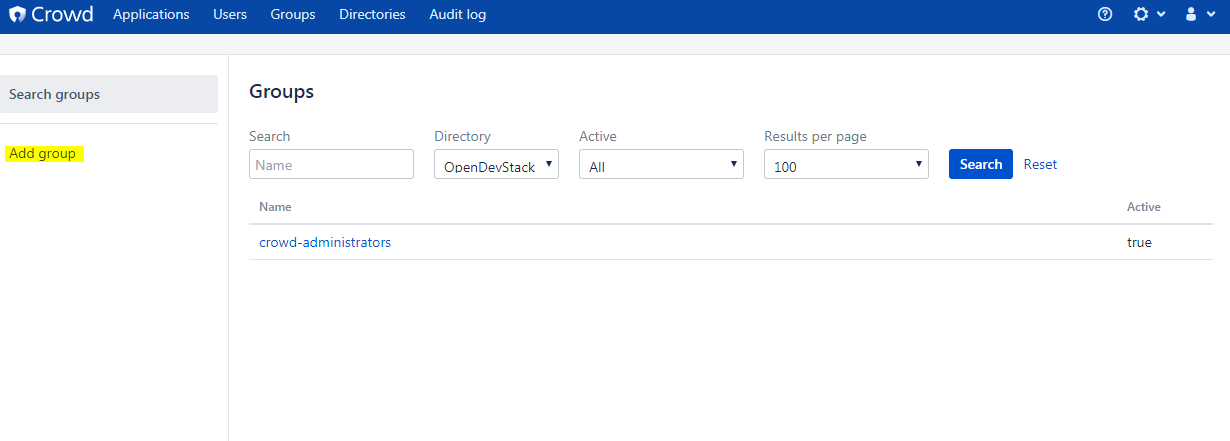
Enter the name and the description for the group, choose the OpenDevStack directory and click Create.

The group has been created. Repeat the steps of group creation for all necessary groups.
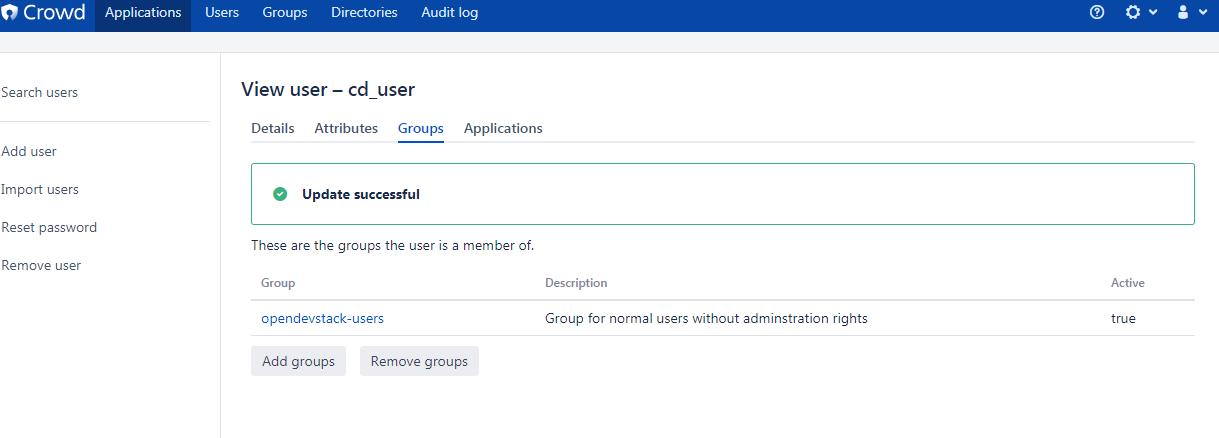
Add CD user
After creating the groups you have to create a user, that is used by continuous integration mechanisms of the OpenDevStack.
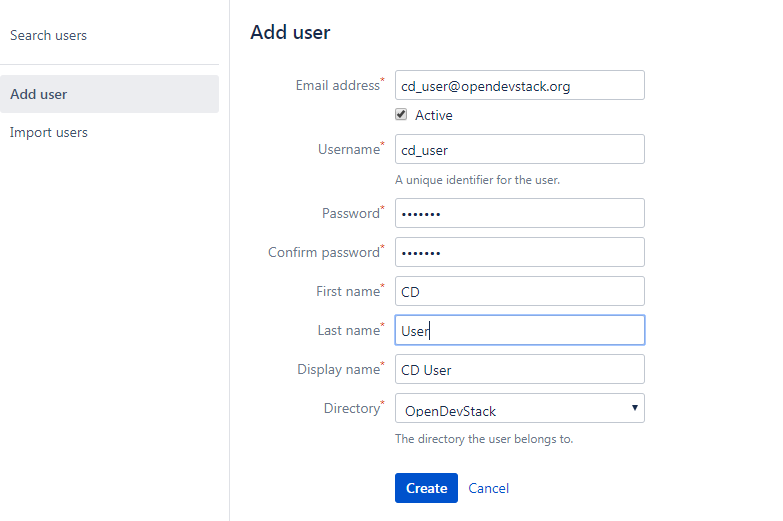
Go to the Users section in Crowd and click Add user.
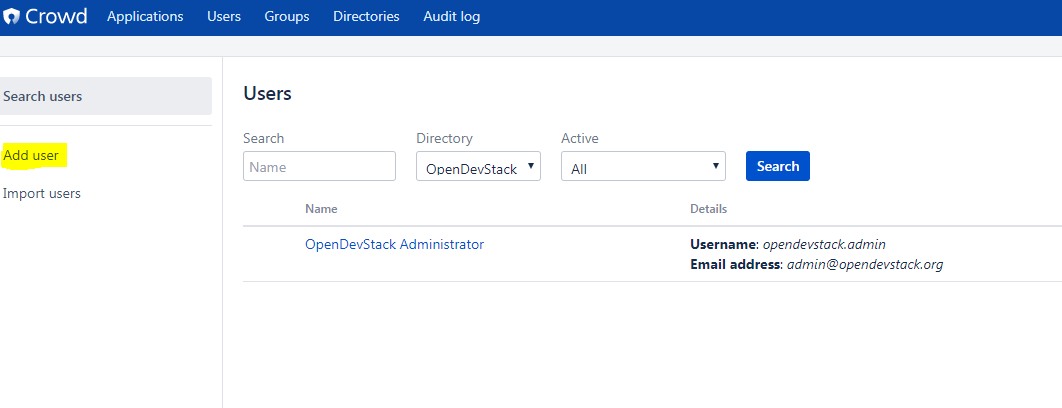
Enter the details for the CD user and click Create. For the provided scripts we assume, that the username cd_user with the password cd_user is used.
In the following overview choose the user’s group tab and click Add groups

Now search for all groups by leaving the Search fields empty, check the opendevstack-users group and click Add selected groups.
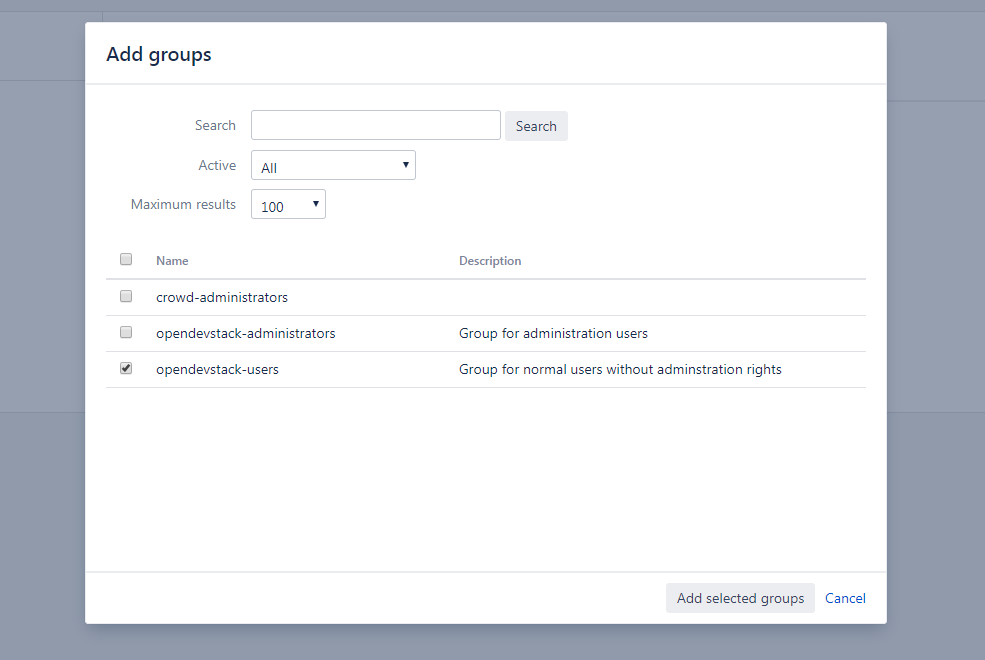
The group has been added to the user.
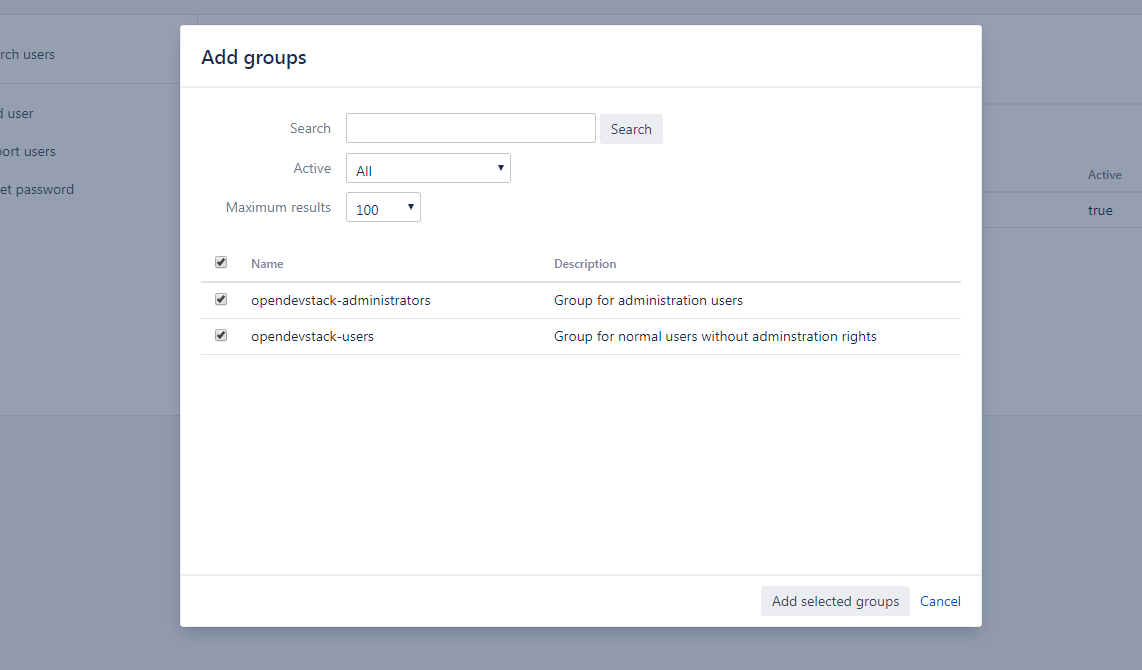
Add groups to administrator
Now you have to add all groups to the administrator. Go to the Users section in Crowd, choose your administration user and open the Groups tab. Click Add groups, search for all by leaving the Search fields empty and add all groups.
Add applications to crowd
You will have to add the applications you want to access with your Crowd credentials in the Crowd console.
Access the Crowd console at http://192.168.56.31:8095/crowd/console/
The following example shows, how to add Jira to the application section. The steps for the other applications are equal.
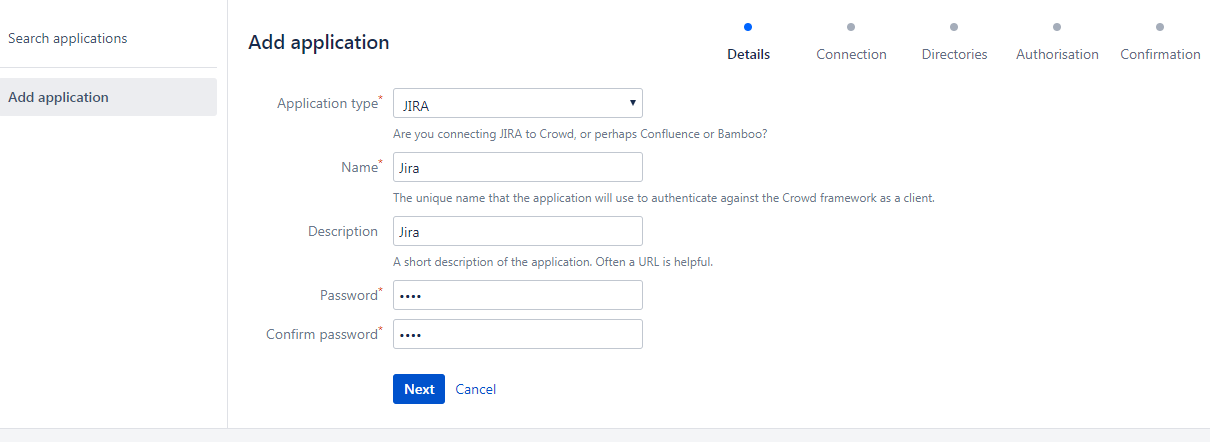
Choose the Applications menu point and click Add application
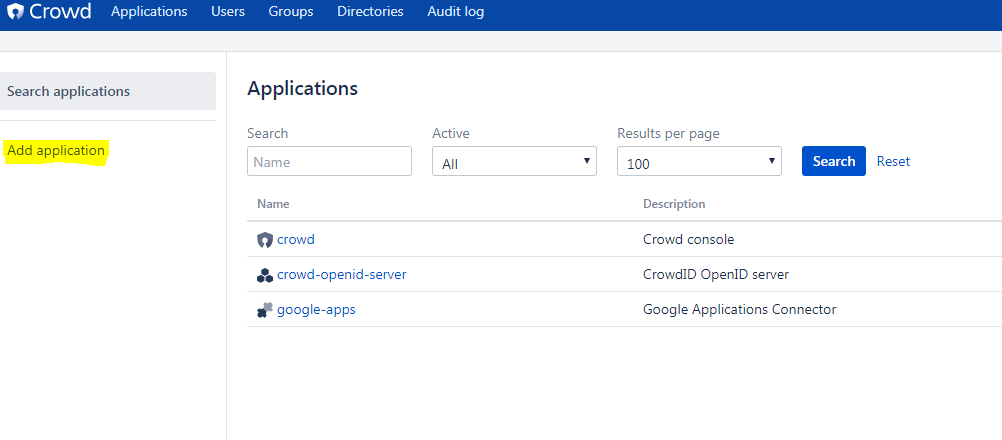
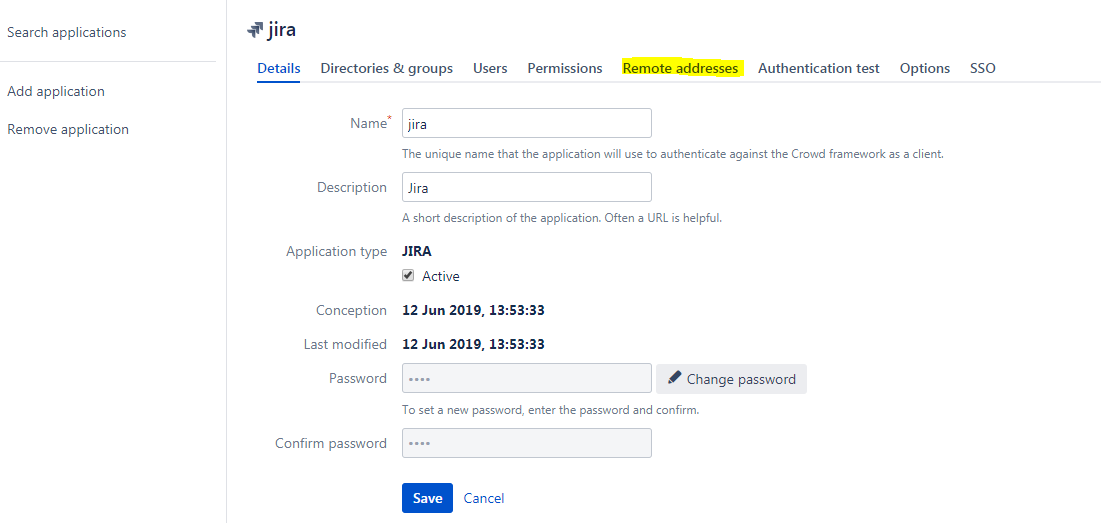
You enter the Add application-Wizard. Enter your application details and proceed with Next.
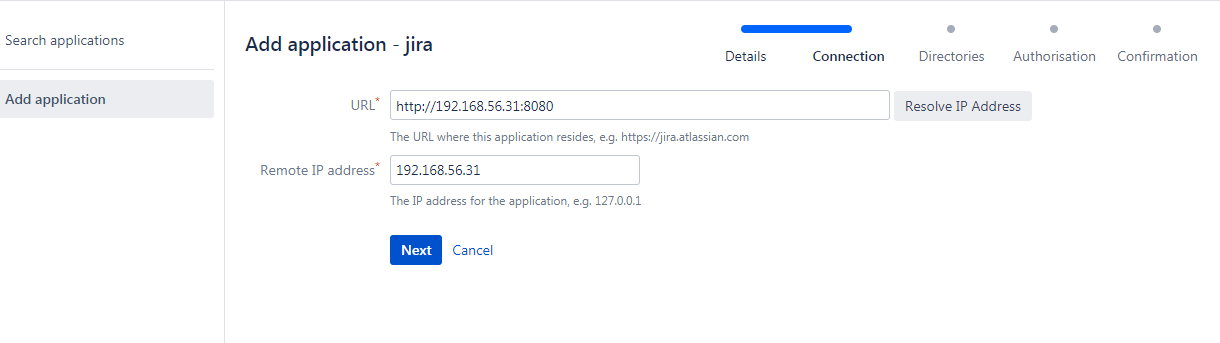
Enter the URL and Remote IP address and click Next.
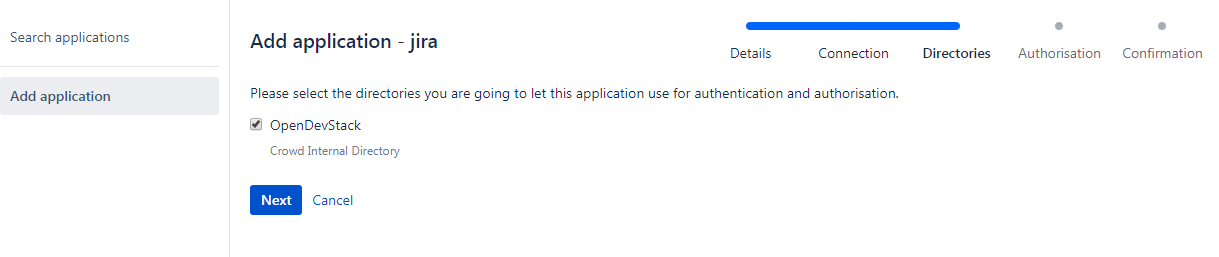
Check the OpenDevStack user directory checkbox. Then proceed with Next.
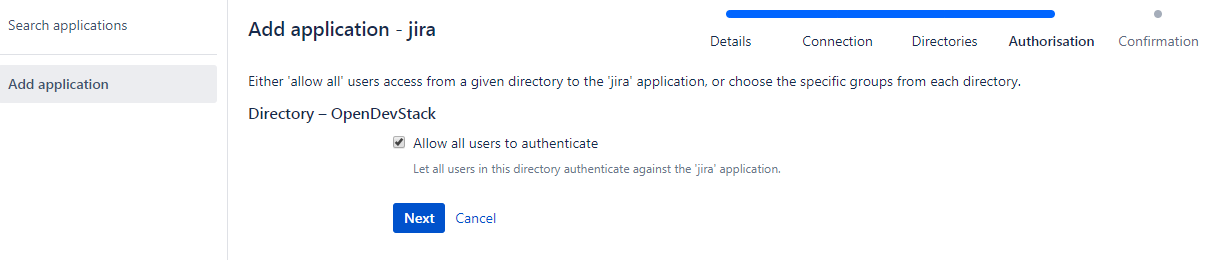
Check the Allow all users to authenticate checkbox. Click Next.
Confirm the application information by clicking Add application

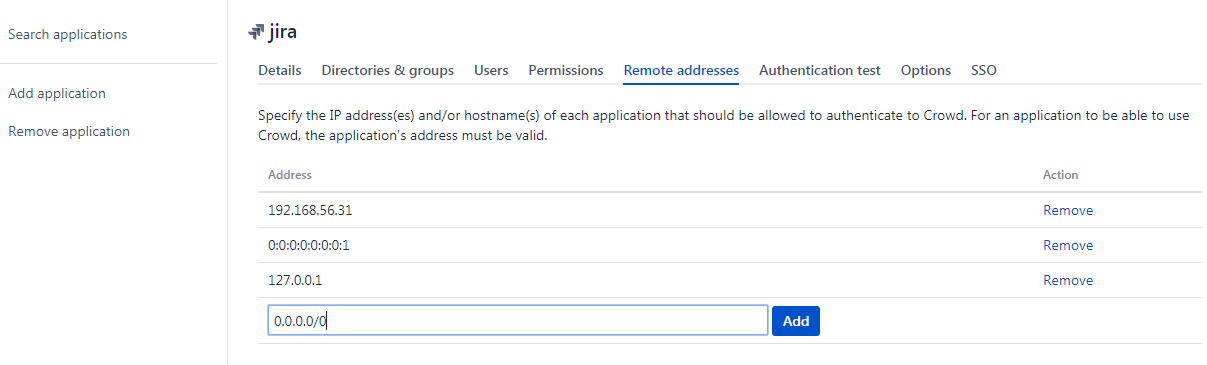
In the following overview choose the Remote addresses tab.
Now enter the CIDR 0.0.0.0/0 in the input field and click Add.
You will have to add all applications listed in the table below. The provided data is meant to be used in the local test environment.
| Application type | Name | Password | URL | IP address | Directories | Authorisation | Additional Remote Adresses |
|---|---|---|---|---|---|---|---|
Jira |
jira |
jira |
192.168.56.31 |
Internal directory with OpenDevStack groups |
all users |
0.0.0.0/0 |
|
Confluence |
confluence |
confluence |
192.168.56.31 |
Internal directory with OpenDevStack groups |
all users |
0.0.0.0/0 |
|
Bitbucket Server |
bitbucket |
bitbucket |
192.168.56.31 |
Internal directory with OpenDevStack groups |
all users |
0.0.0.0/0 |
|
Generic application |
rundeck |
rundeck |
192.168.56.31 |
Internal directory with OpenDevStack groups |
all users |
0.0.0.0/0 |
|
Generic application |
provision |
provision |
192.168.56.1 |
Internal directory with OpenDevStack groups |
all users |
0.0.0.0/0 |
|
Generic application |
sonarqube |
sonarqube |
192.168.56.101 |
Internal directory with OpenDevStack groups |
all users |
0.0.0.0/0 |
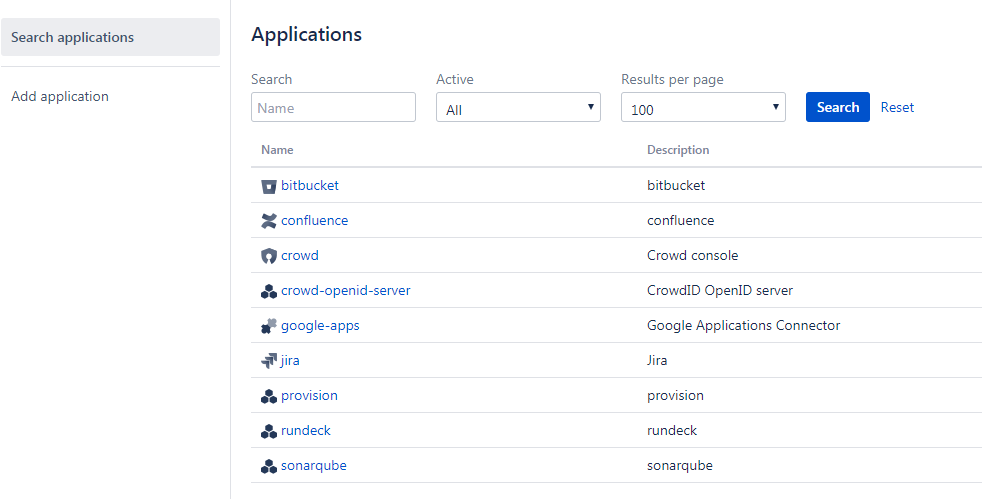
After adding all applications they should shown at the applications overview in Crowd.
Attlassian Bitbucket
Run Configuration Wizard
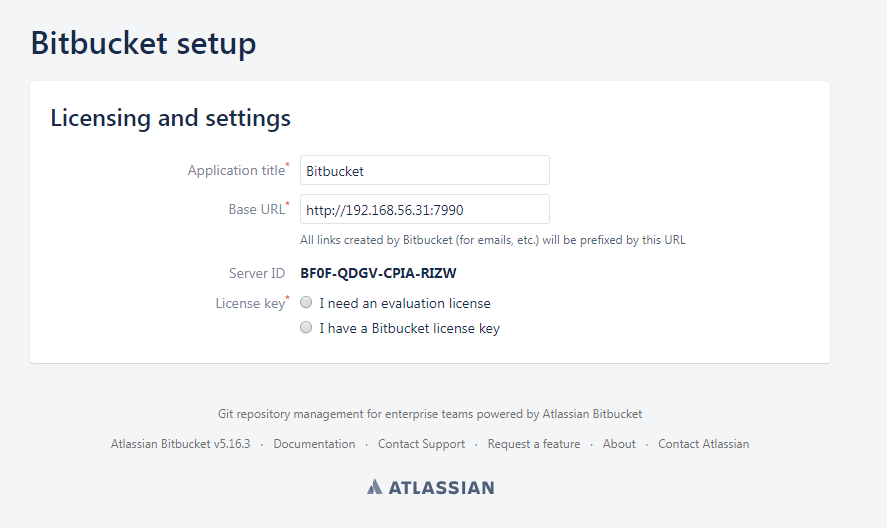
Access http://192.168.56.31:7990
Be patient. First time accessing this page takes some time.
On the configuration page you have the possibility to define the application name, the base URL and to get an evaluation license or enter a valid license. If you choose to get an evaluation license you can retrieve it from the my atlassian page. You will be redirected automatically.
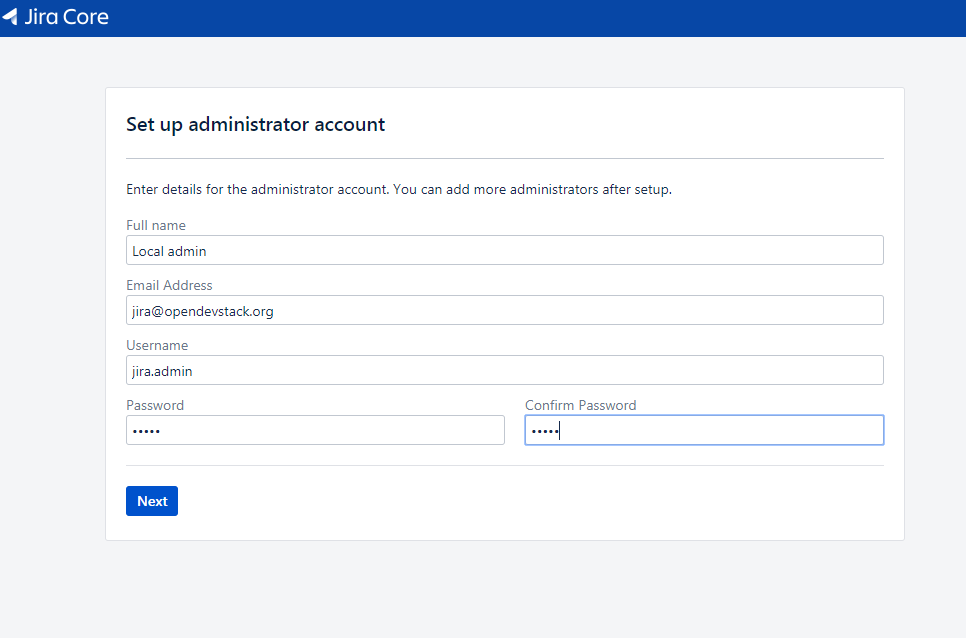
After adding the license you have to create a local Bitbucket administrator account.
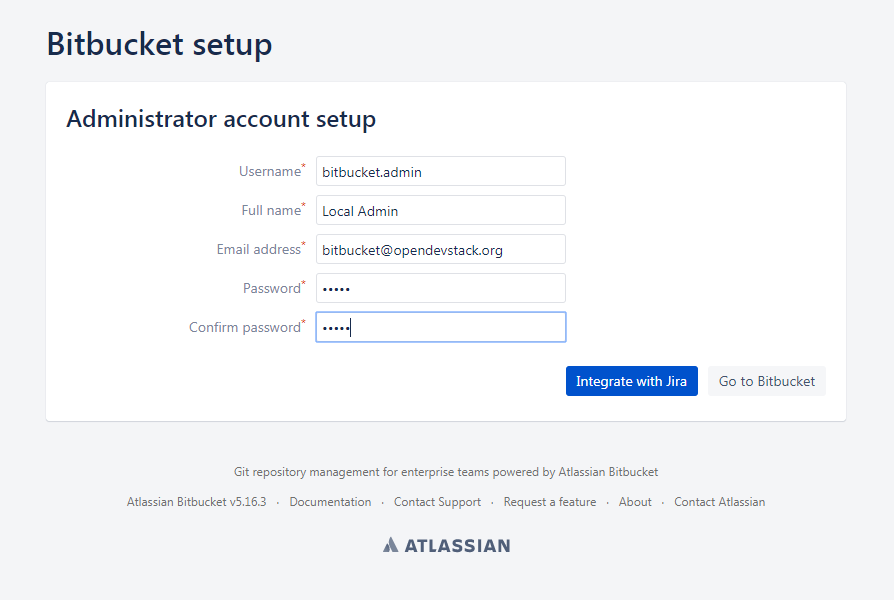
Don’t integrate Bitbucket with Jira, but proceed with going to Bitbucket.
Configure Crowd access
Go to the Bitbucket start page at http://192.168.56.31:7990/ Open the administration settings and navigate to the User directories menu.
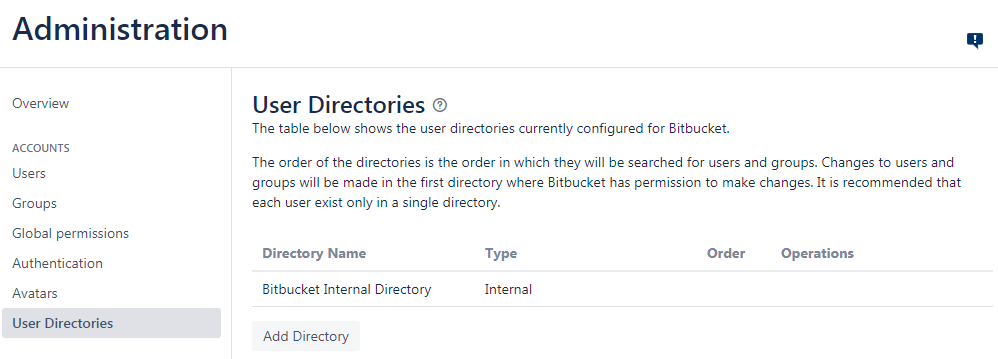
Here you have to add a directory of type Atlassian Crowd.
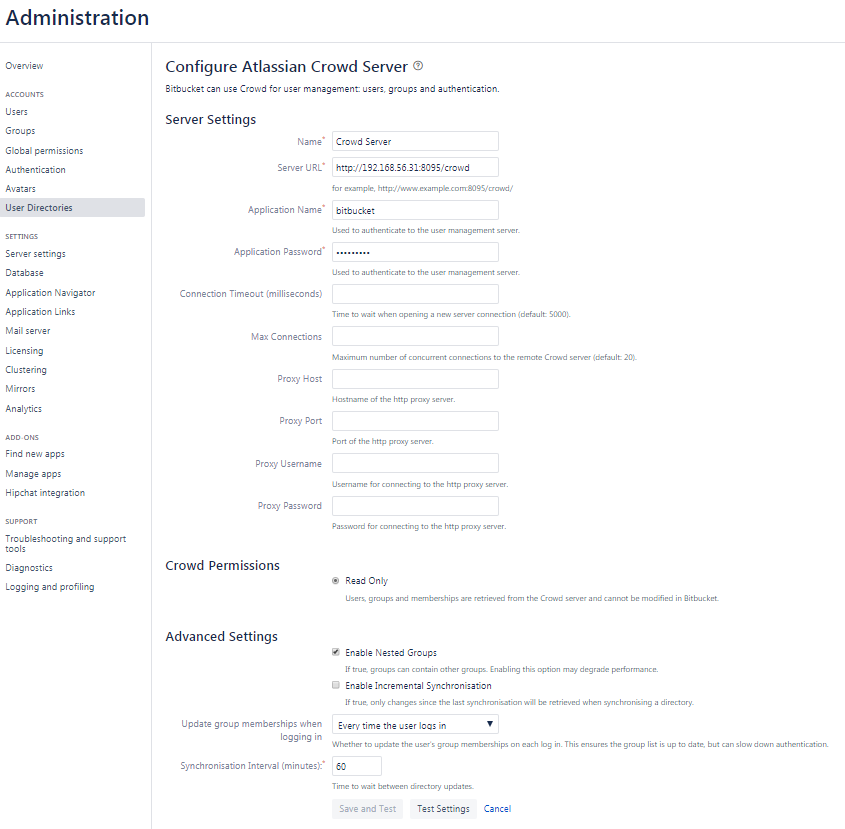
In the following form add the Crowd server URL http://192.168.56.31:8095/crowd, the application name and the password you have defined for Bitbucket in crowd.
For the local test environment this is bitbucket bitbucket
Now activate nested groups and deactivate the incremental synchronization
The group membership should be proofed every time a user logs in.
Test the settings and save them.
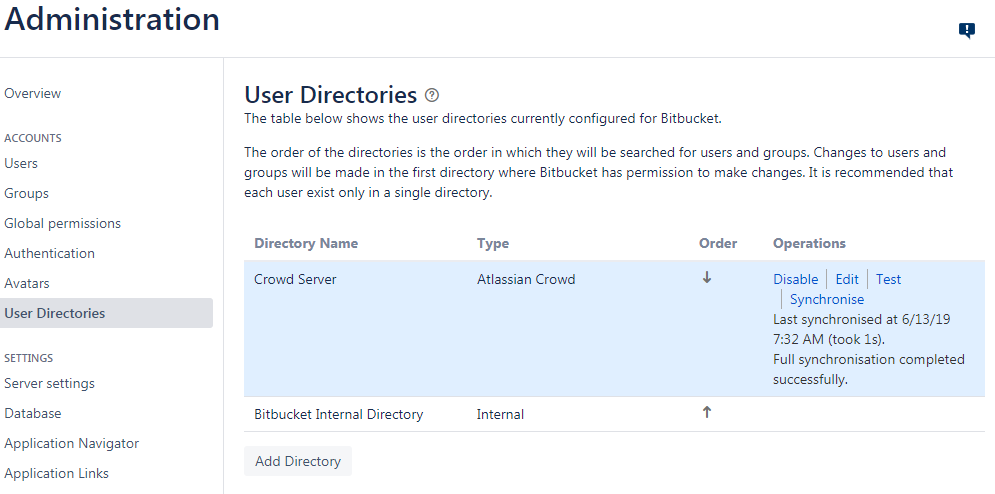
Now change the order of the user directories. The Crowd directory has to be on first position. Synchronize the directory, so all groups and users are available in Bitbucket.
Add permissions
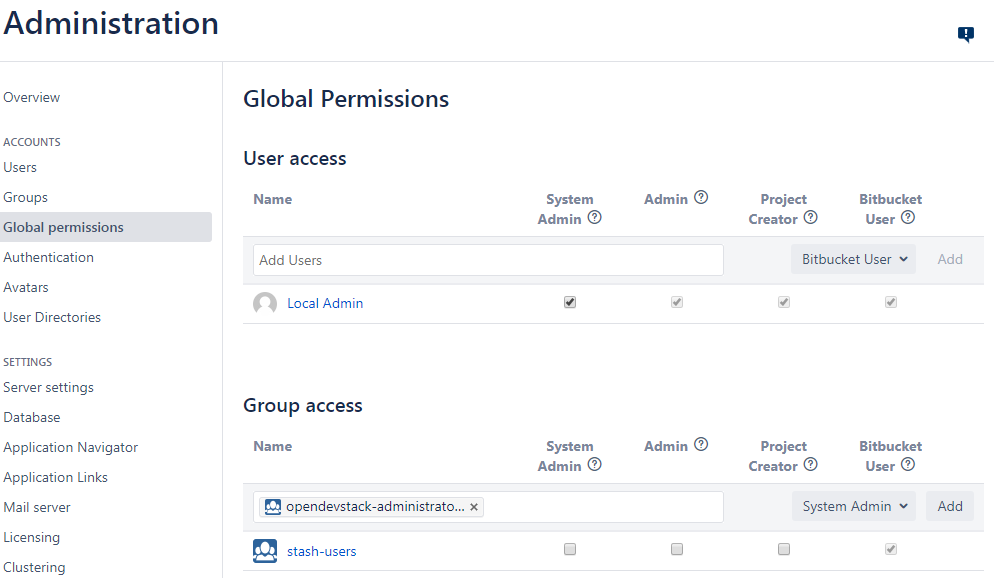
Now you have to configure the permissions for the OpenDevStack groups. Go to the Global permissions menu.
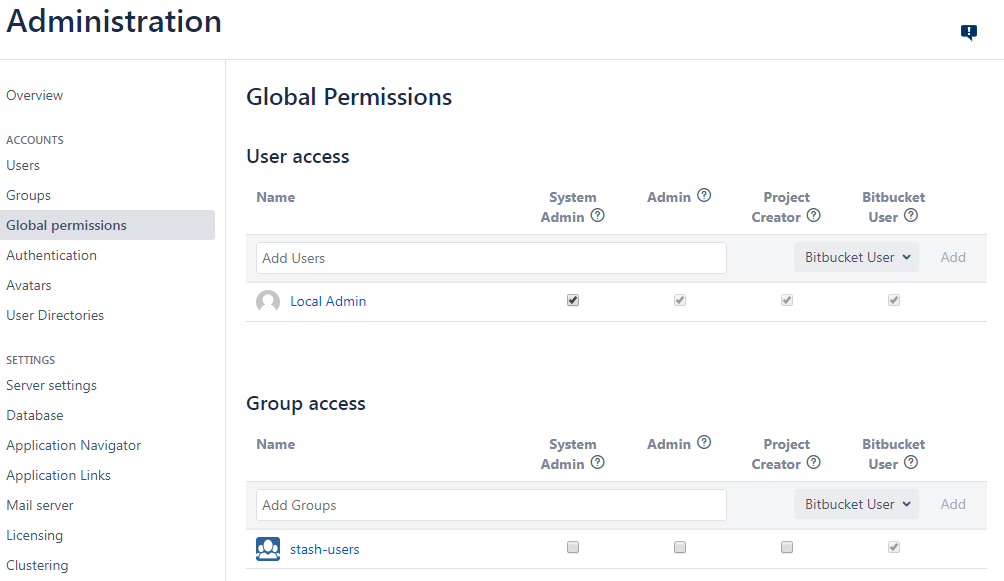
In the Group access section add the opendevstack-administrators group with System Admin rights.
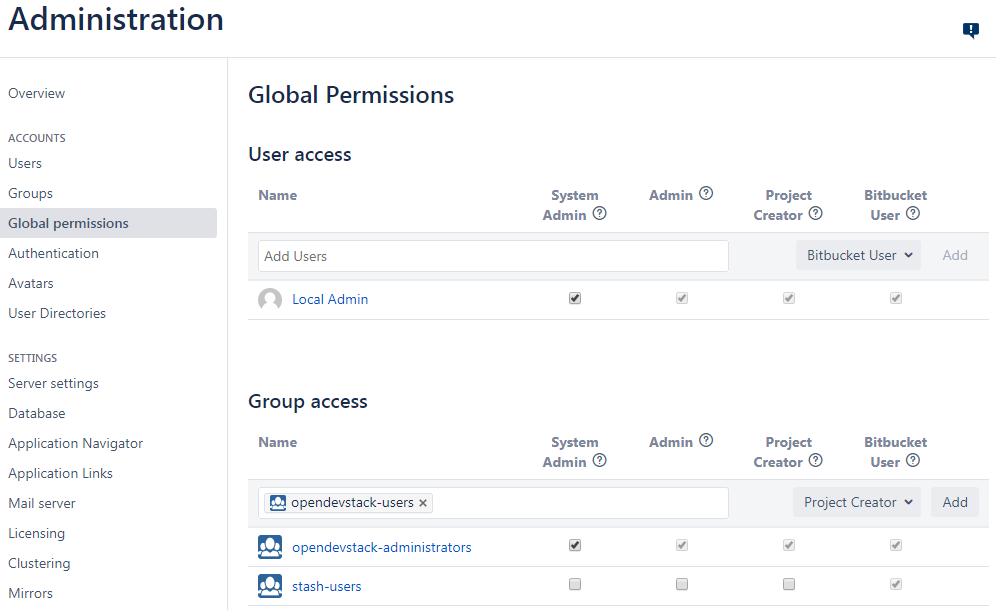
Add the opendevstack-users group with Project Creator rights.
Create OpenDevStack project in Bitbucket
The local checked out OpenDevStack repositories will be mirrored into the Bitbucket instance. Therefore, we need to create a new project within Bitbucket.
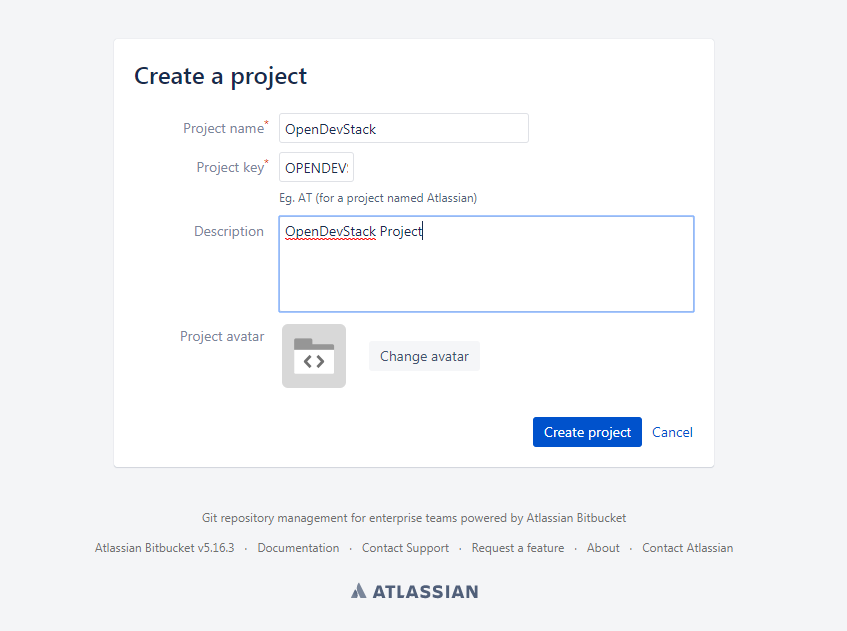
Go to the Projects page in Bitbucket and click the Create project button.
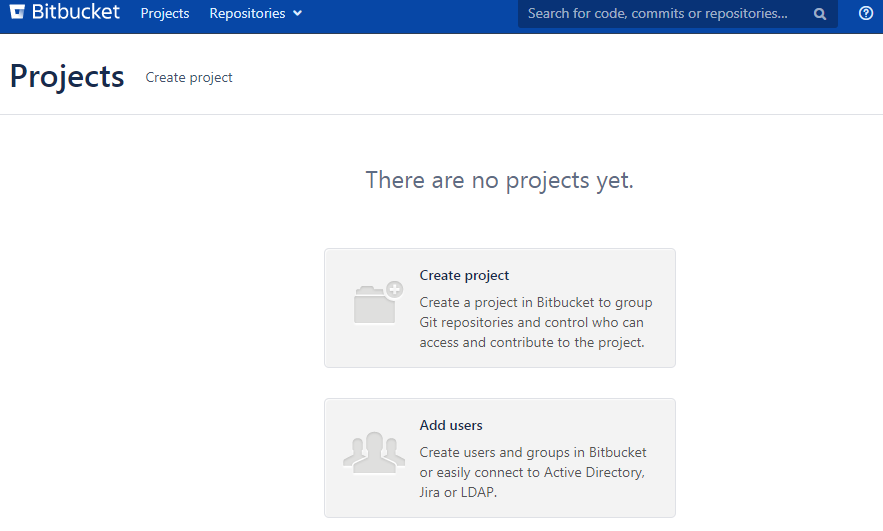
Now enter the Project name: OpenDevStack with the Project key OPENDEVSTACK and hit
Create Project.
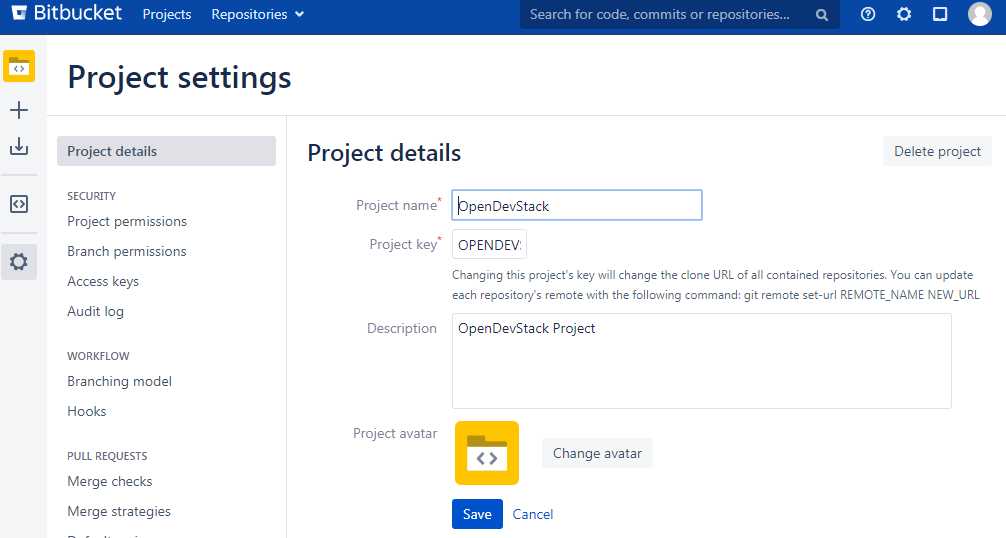
Now open the project settings.
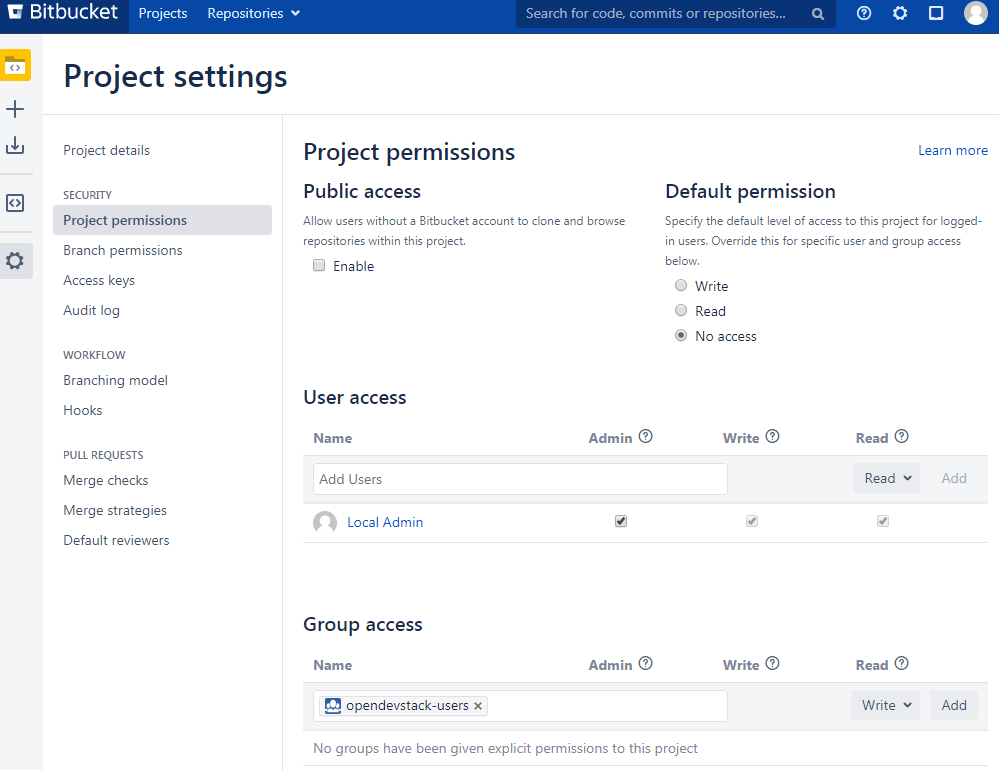
In the Project permissions section, allow the opendevstack-users group write access.
After you have adjusted the project permissions, you will have to create the repositories for the OpenDevStack. Go to the OpenDevStack project overview and choose the Create repository option, either with the '+' sign on the left menu bar or with the Create repository button in the middle of the screen, if you have an empty project.
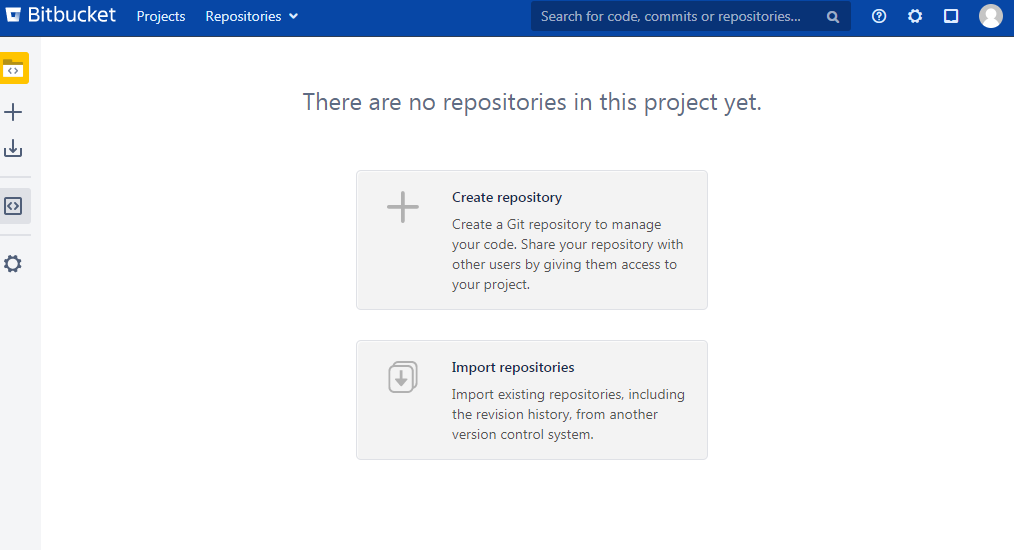
Enter the name for the repository and click Create repository.
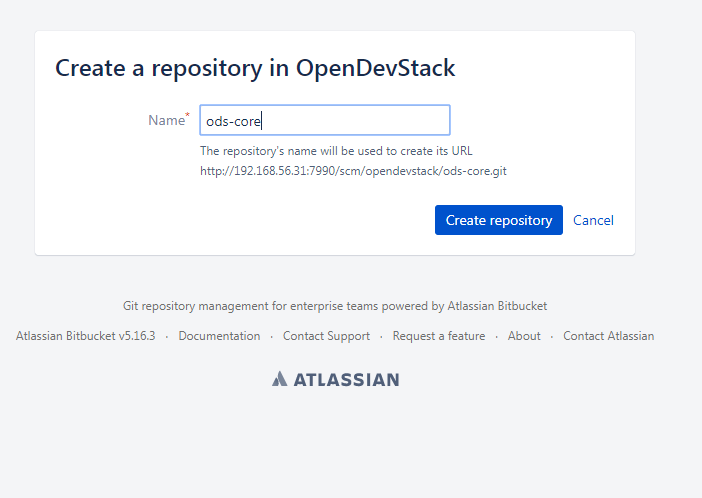
You will have to create the repositories listed in the table below.
| Repositories |
|---|
ods-core |
ods-configuration |
ods-configuration-sample |
ods-jenkins-shared-library |
ods-project-quickstarters |
ods-provisioning-app |
Add SSH Key for CD user to Bitbucket
You will have to add a SSH key to the cd_user in Bitbucket, so Rundeck will be able to communicate with Bitbucket.
First got to the Users section in the Bitbucket administration.
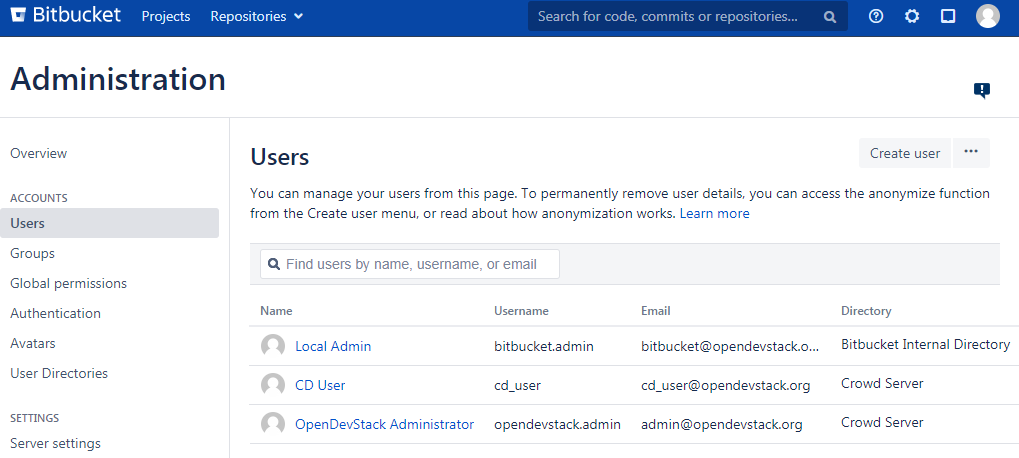
Choose the cd_user and select the SSH keys tab.
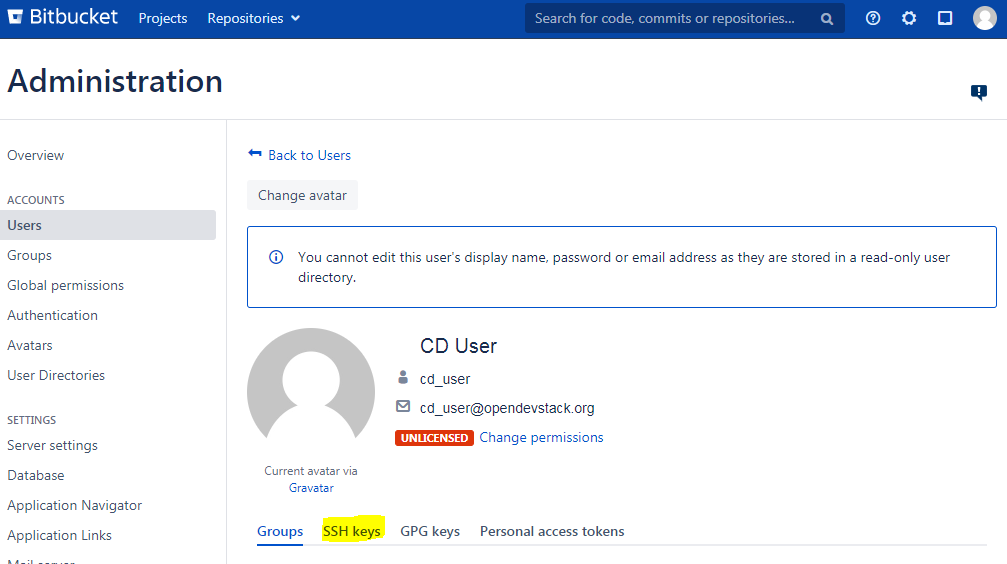
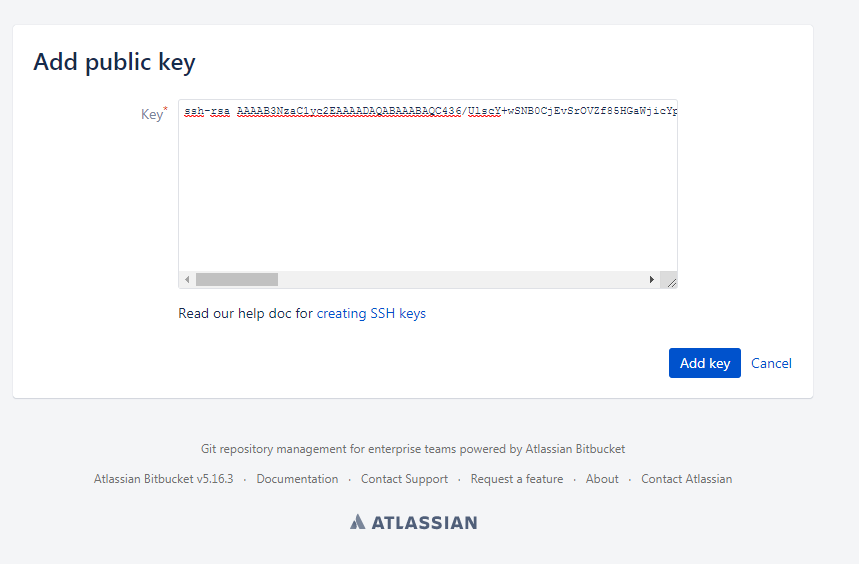
Click Add key
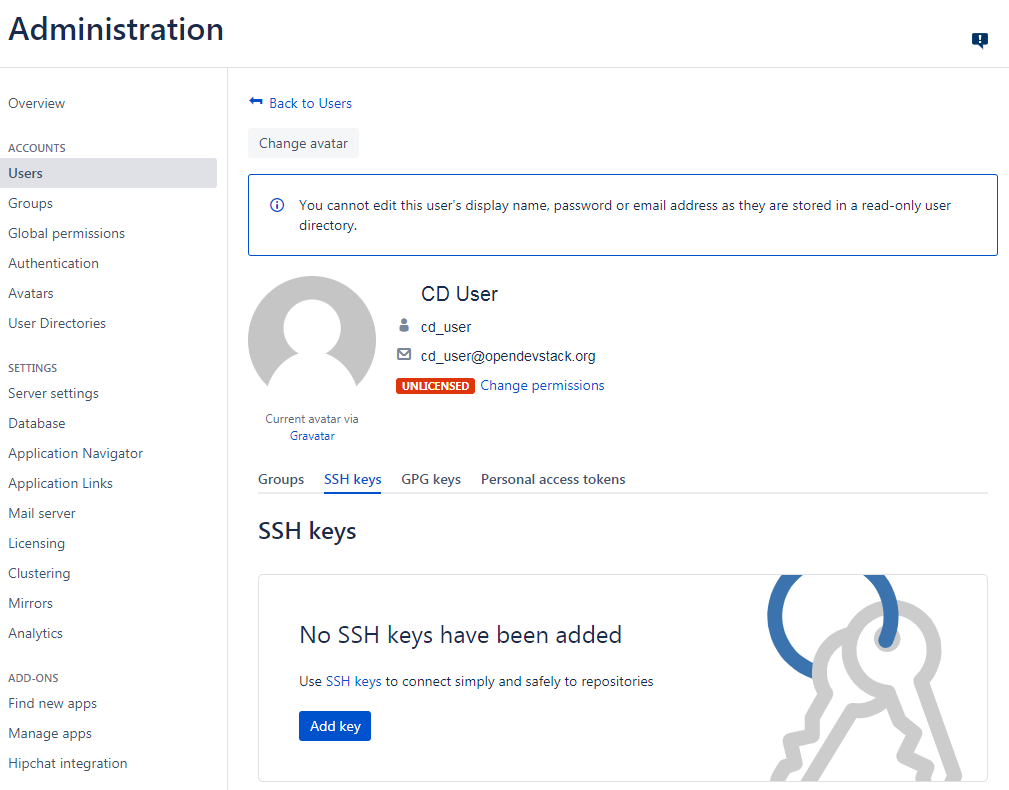
The key has been auto generated during the setup script execution. Navigate to the base directory you created at the beginning of the setup process.
There you will find a file named id_rsa_bitbucket.pub
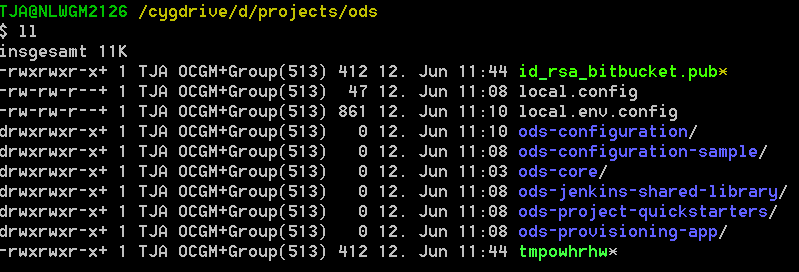
Copy the content of the file

Paste the key to the input field in Bitbucket and click Add key
Atlassian Jira
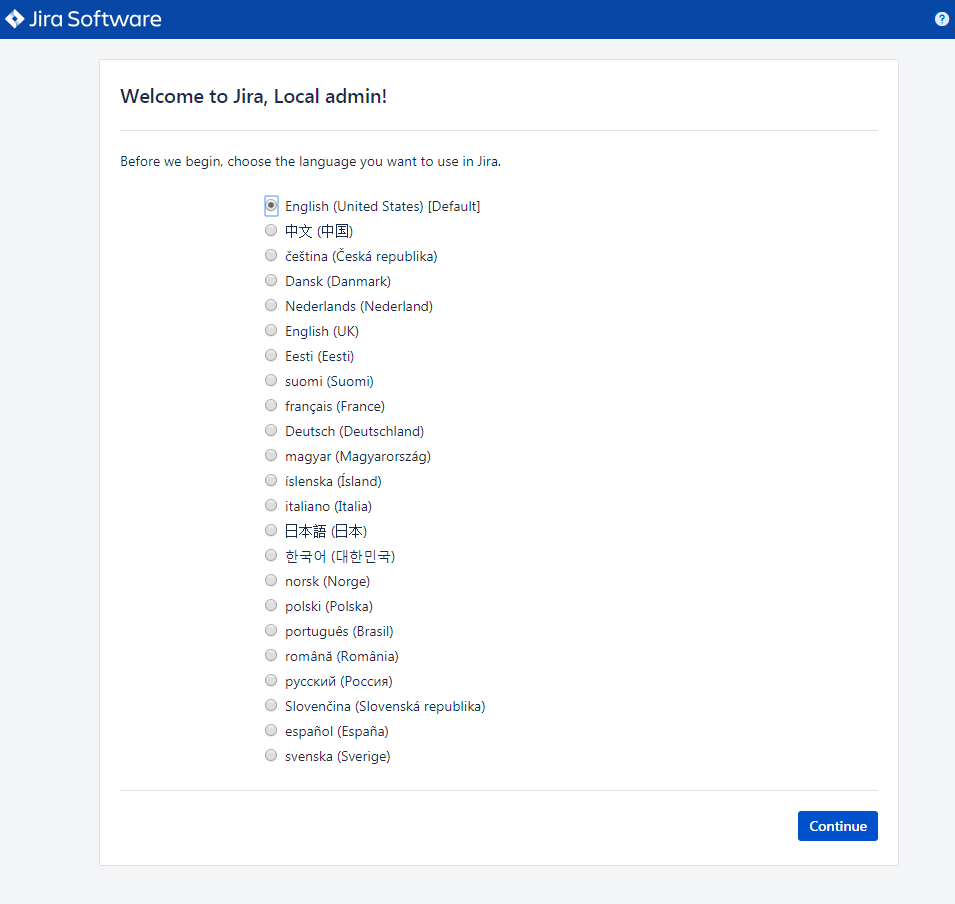
Run Configuration Wizard
Access http://192.168.56.31:8080
Be patient. First time accessing this page takes time.
Step 1: Setup application properties
Here you have to choose the application title and the base URL. You can leave the data as is for the test environment.

Configure user directory
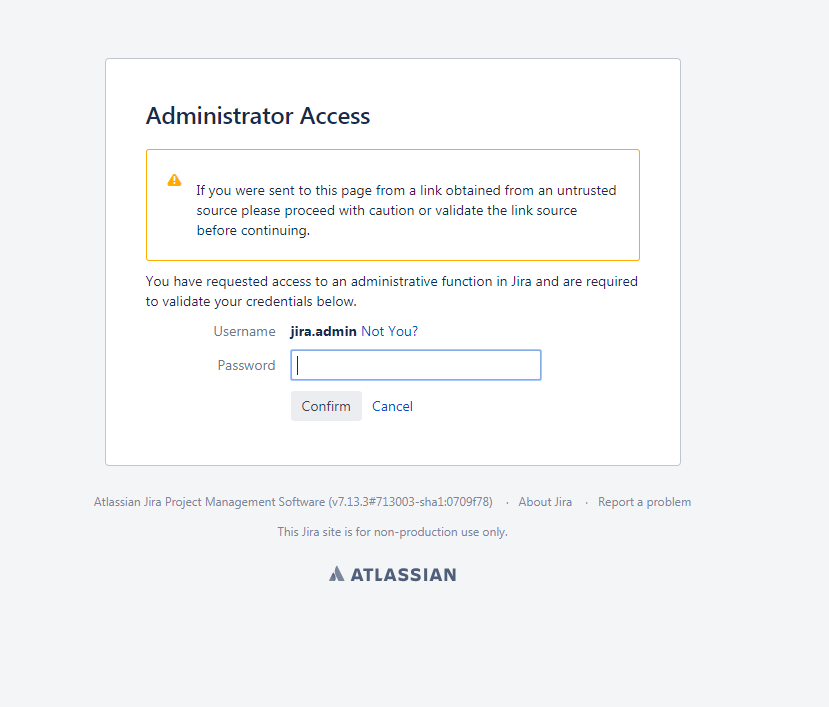
Open the User management in the Jira administration. To enter the administration, you have to verify you have admin rights with the password for your admin user.
Click the User Directories entry at the left.
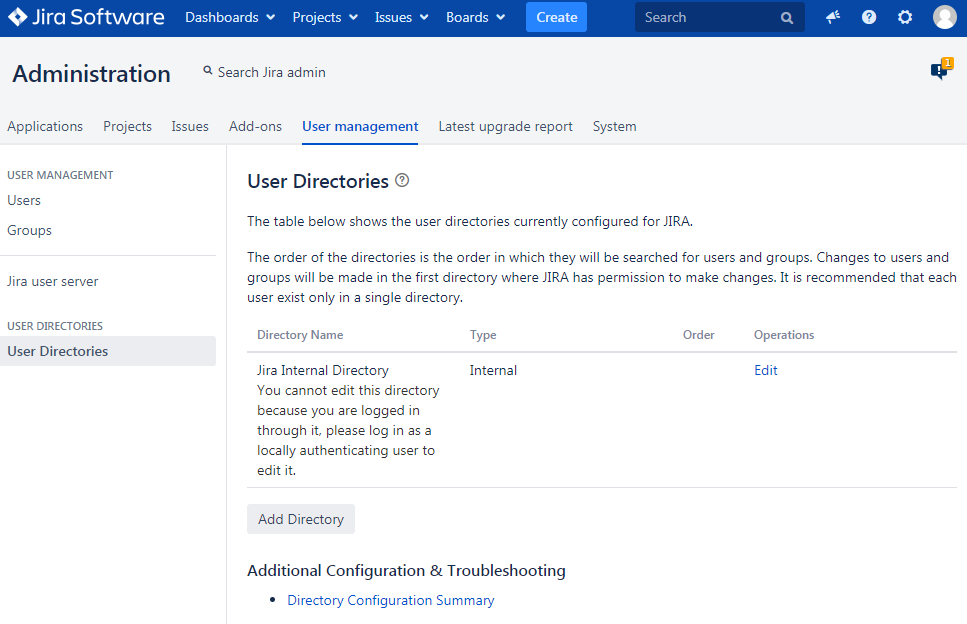
Now choose Add Directory.
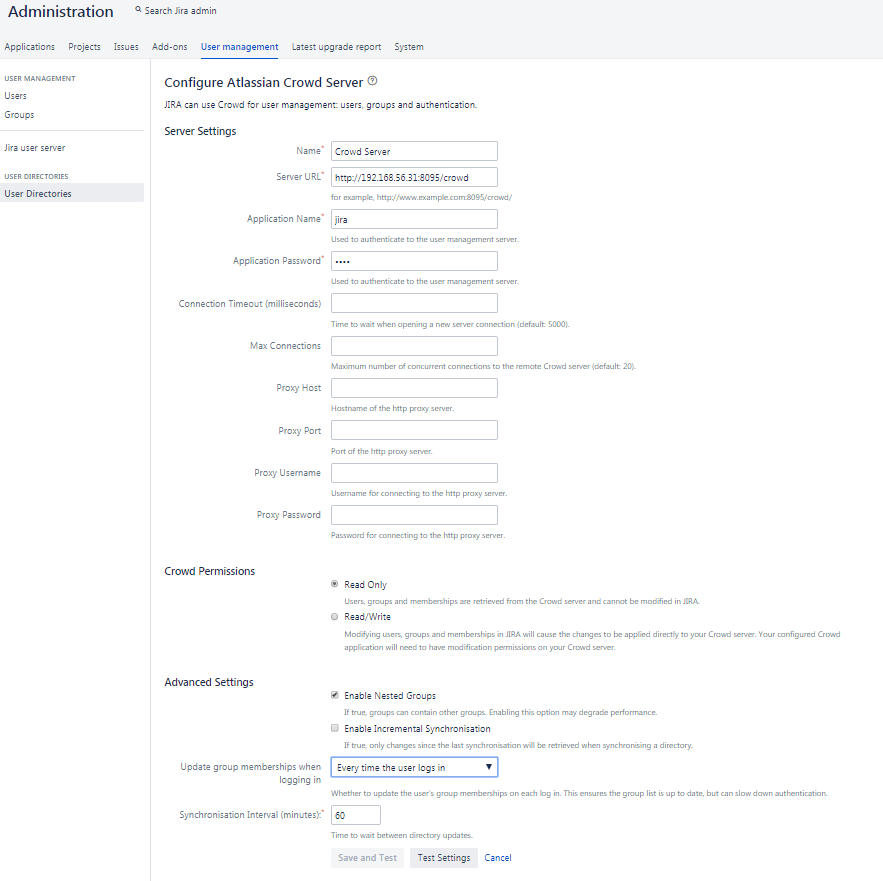
Here you have to add a directory of type Atlassian Crowd.
Enter the Crowd server URL http://192.168.56.31:8095/crowd
You also have to fill in the application name and the password you have defined for Jira in crowd.
For the local test environment this is jira jira.
Now activate nested groups and deactivate the incremental synchronization The group membership should be proofed every time a user logs in. Test the settings and save them.
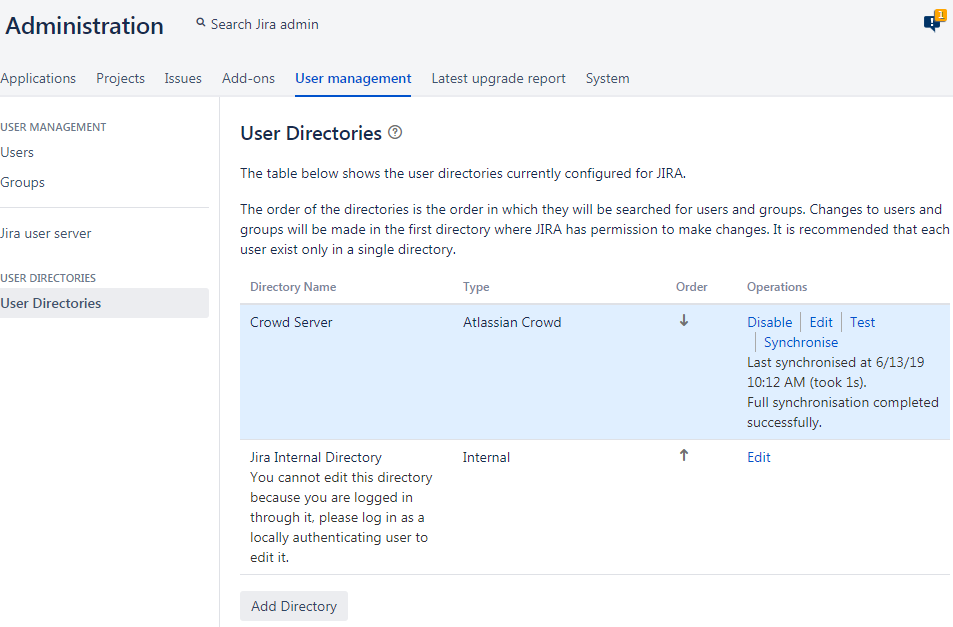
Now change the order of the user directories. The Crowd directory has to be on first position. Synchronize the directory, so all groups and users are available in Jira.
Add permissions
The next step is to configure the permissions for the OpenDevStack user groups. Go to the Global Permissions menu beneath the System tab.
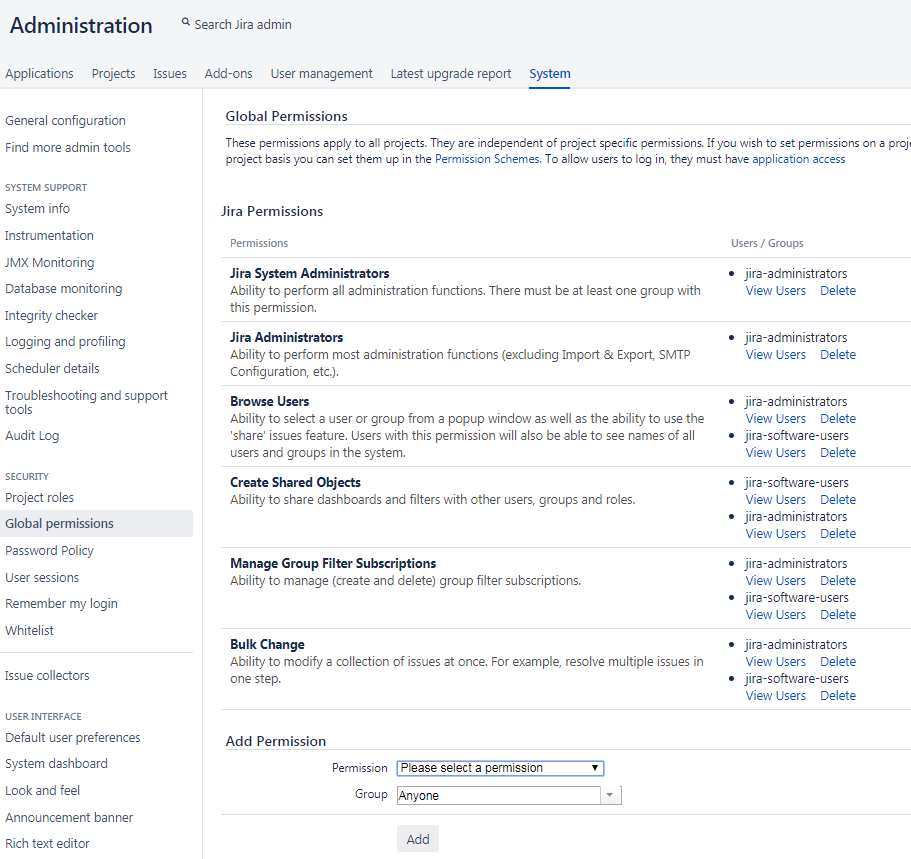
There you will have to add the OpenDevStack groups according to the Jira user groups. For this choose the permission and the user group in the Add Permission section of the page and click Add.
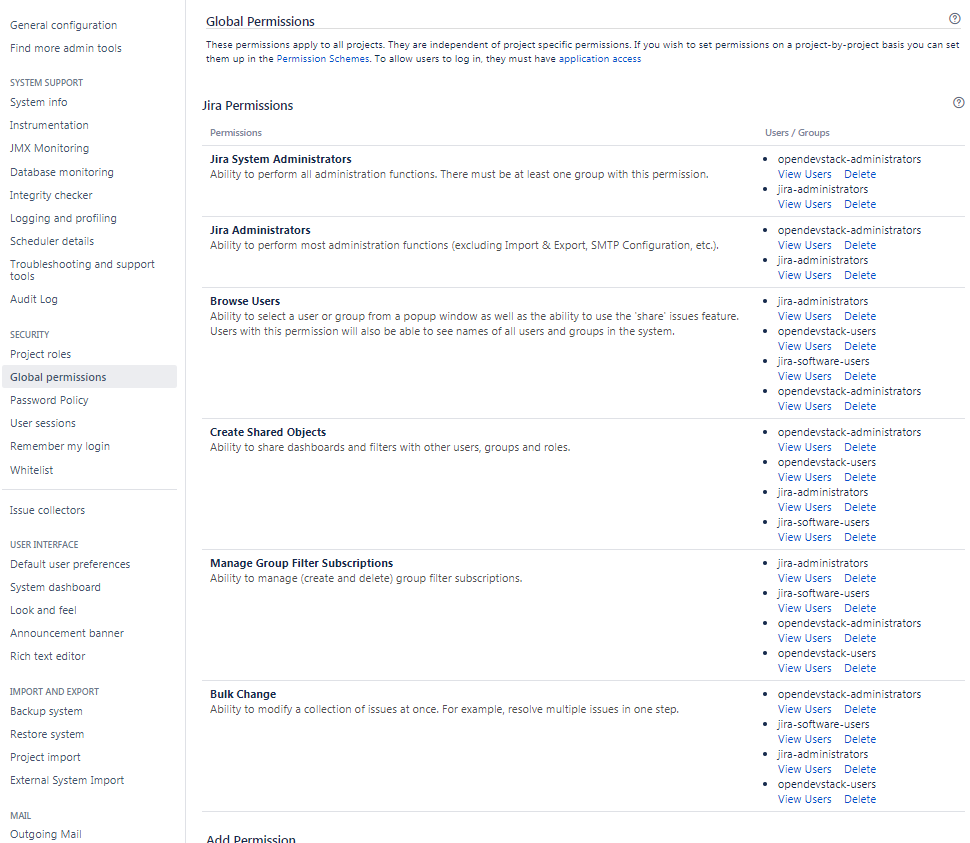
See the table below for the permission mapping.
| Permission | User group |
|---|---|
Jira System Administrators |
opendevstack-administrators |
Jira Administrators |
opendevstack-administrators |
Browse Users |
opendevstack-(administrators|users) |
Create Shared Objects |
opendevstack-(administrators|users) |
Manage Group Filter Subscriptions |
opendevstack-(administrators|users) |
Bulk Change |
opendevstack-(administrators|users) |
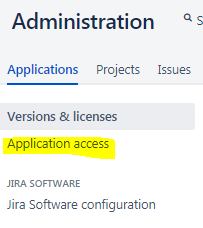
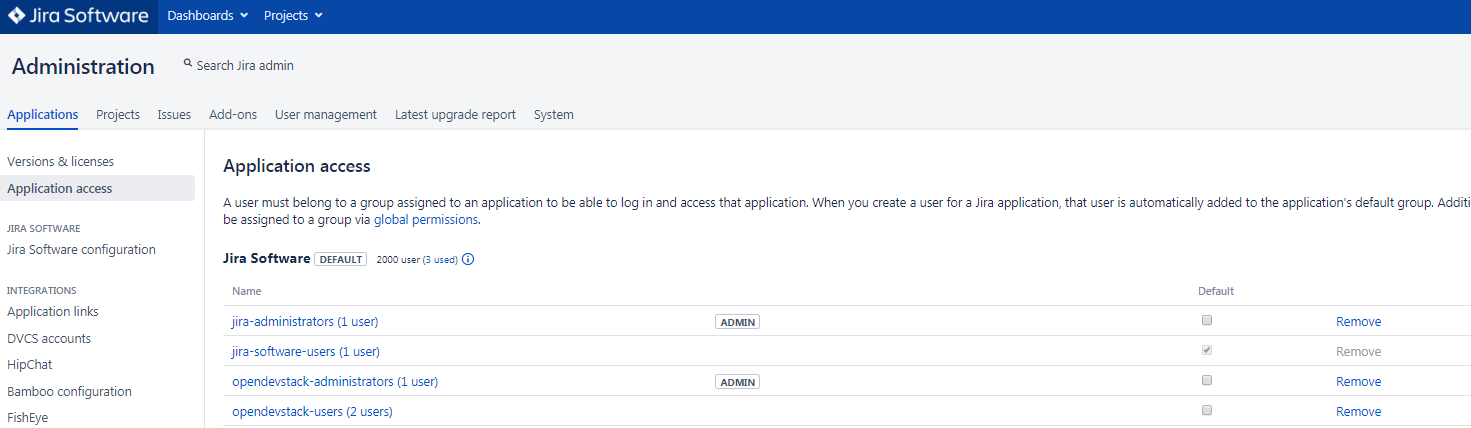
Add application access
The last step is to grant the created OpenDevStack groups application access. Go to the Application access menu beneath the Applications tab.
There you will have to add the OpenDevStack groups according to the Jira user groups.

Click on the group selection and choose the group you want to add to Jira.
Atlassian Confluence
Run Configuration Wizard
Access http://192.168.56.31:8090
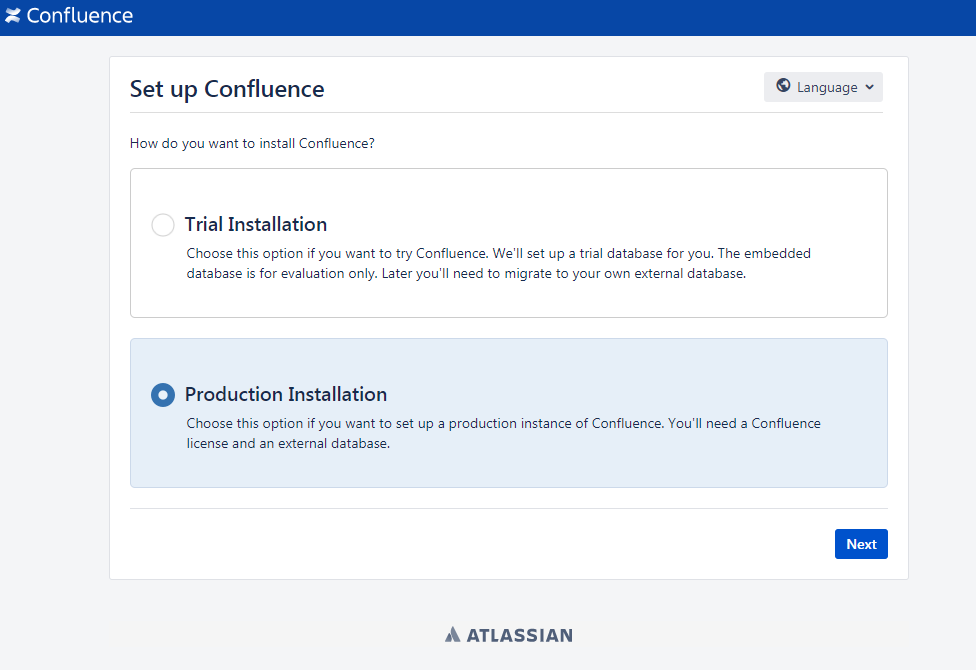
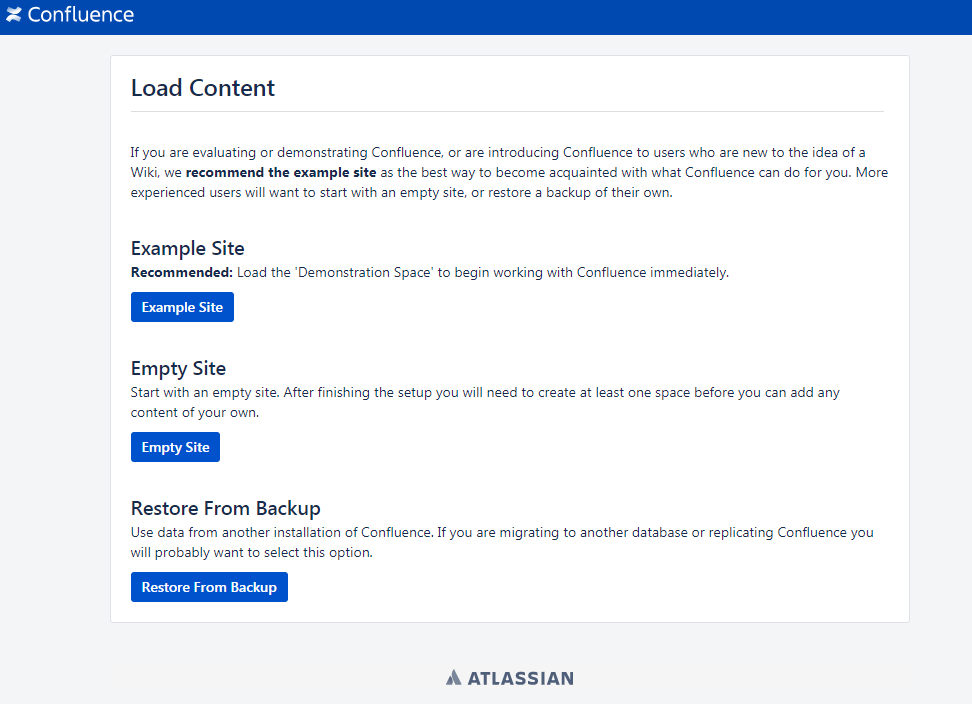
Step 1: Set up Confluence
Here you have to choose Production Installation, because we want to configure an external database.
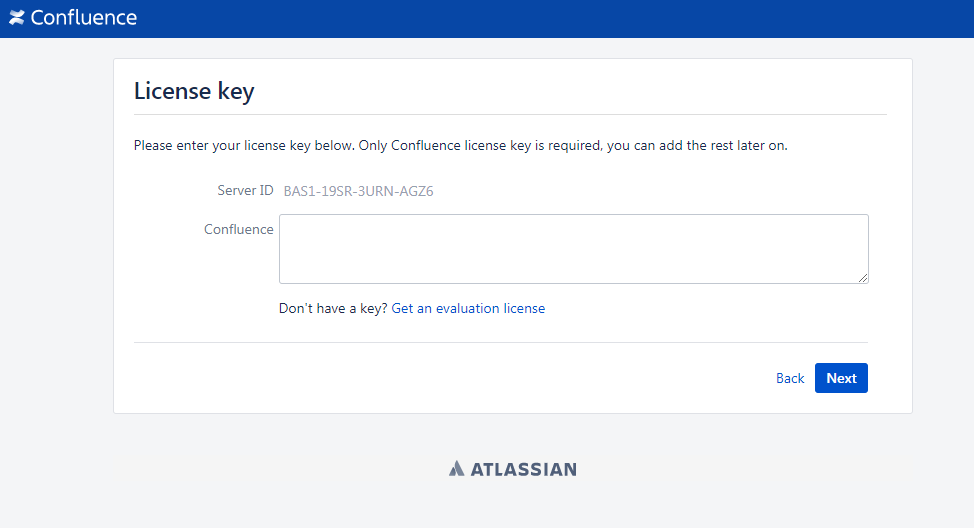
Step 3: License key
Here you are able to get an evaluation license from atlassian or to enter a valid license key.
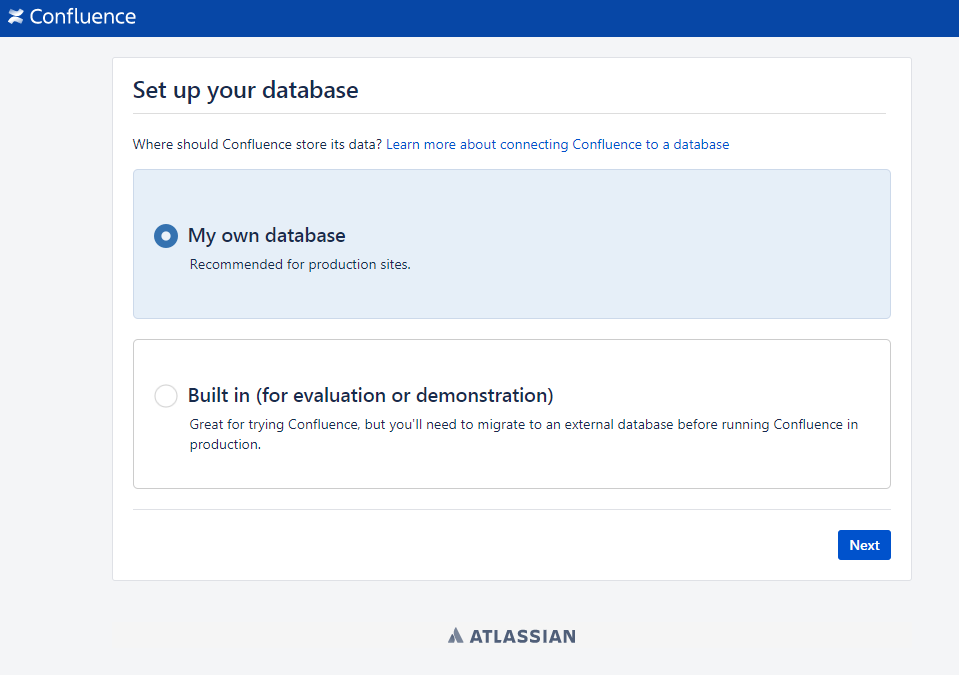
Step 5: Configure Database
Choose By connection string as Setup type and configure the database with the following values:
| Option | Value |
|---|---|
Database Type |
PostgreSQL |
Database URL |
jdbc:postgresql://localhost:5432/confluence |
User Name |
confluence |
Password |
confluence |
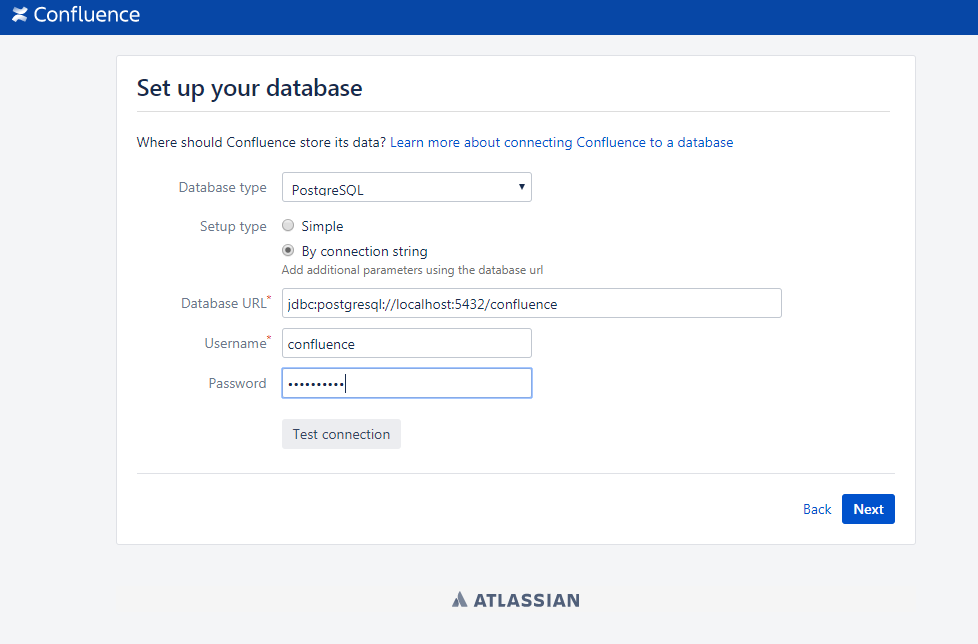
Click Next to proceed.
Be patient. This step takes some time until next page appears.
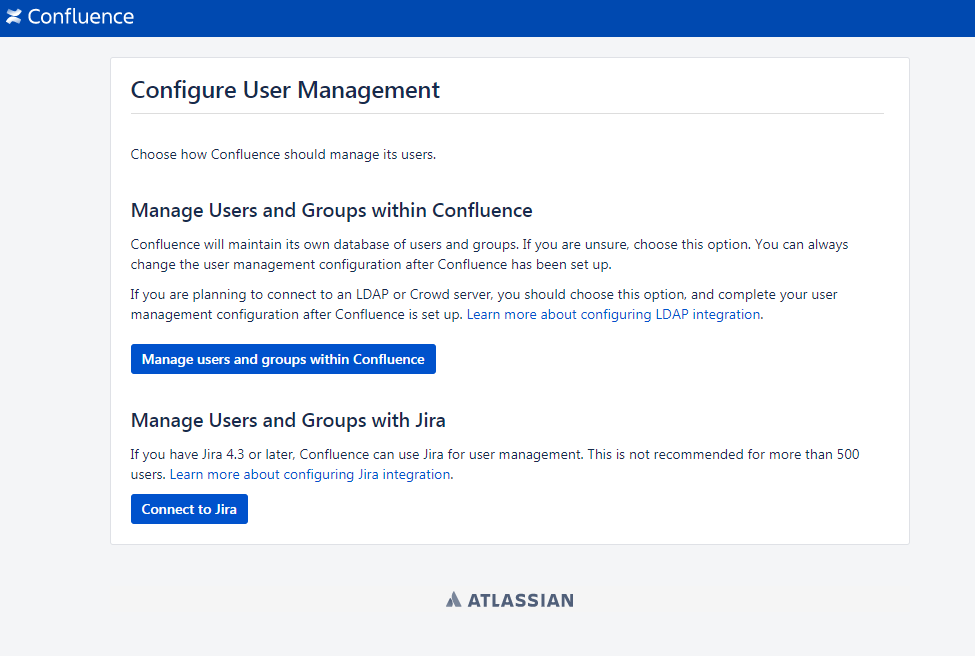
Configure user directory
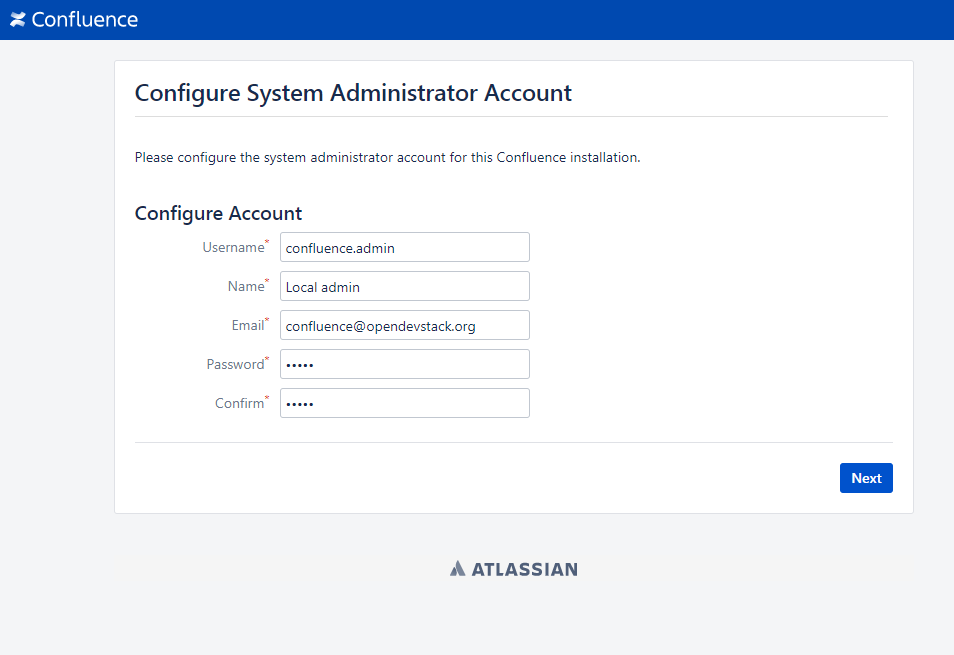
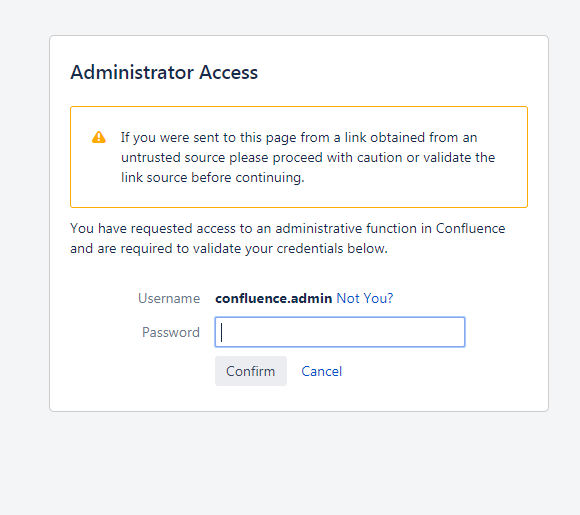
Open the User management in the Confluence administration.
To enter the administration, you have to verify you have admin rights with the password for your admin user.
Click the User Directories entry at the left in the USERS & SECURITY section.
Now choose Add Directory.
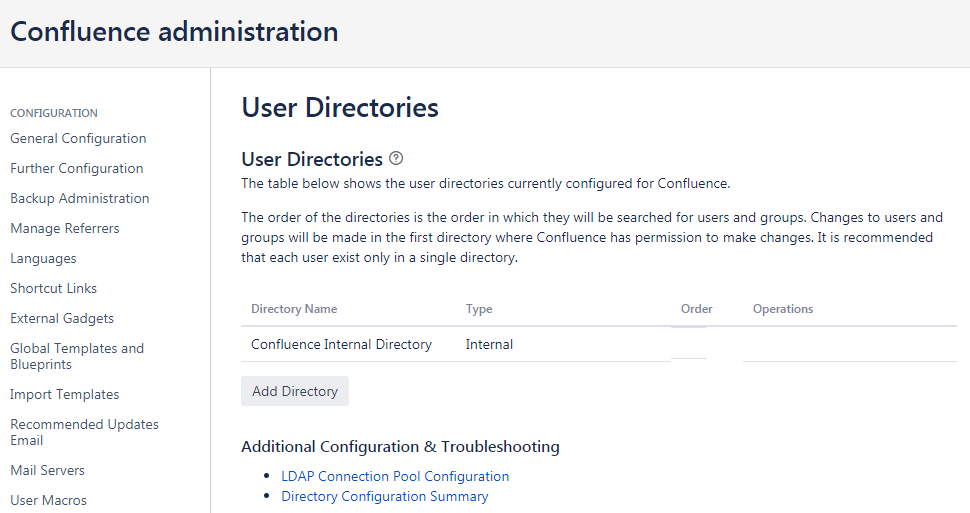
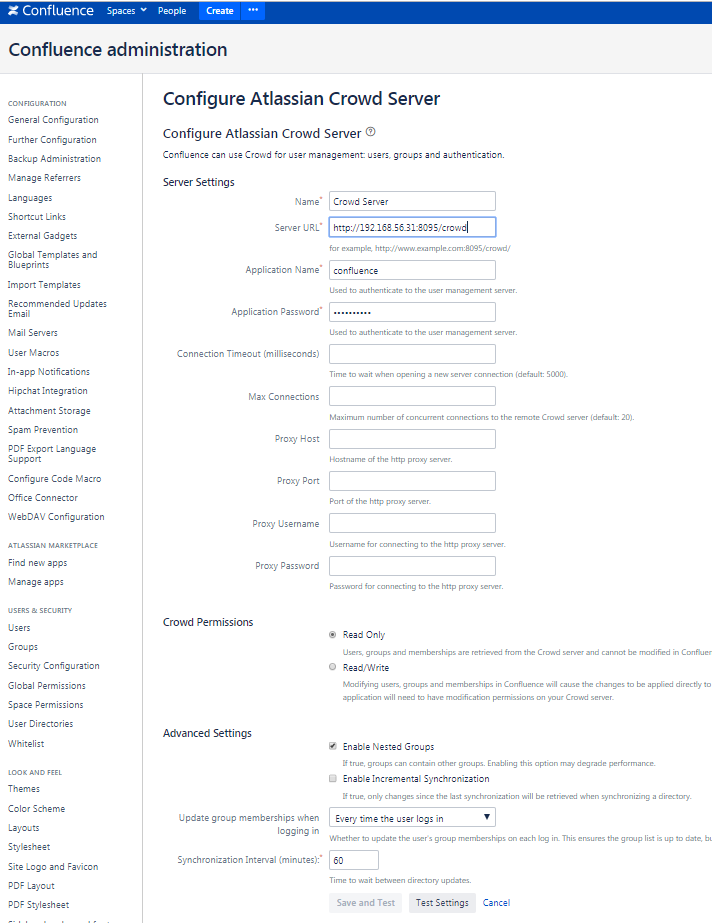
Here you have to add a directory of type Atlassian Crowd.
Now enter the Crowd server URL http://192.168.56.31:8095/crowd
You also have to fill in the application name and the password you have defined for Confluence in crowd.
For the local test environment this is confluence confluence
Activate nested groups and deactivate the incremental synchronization
The group membership should be proofed every time a user logs in.
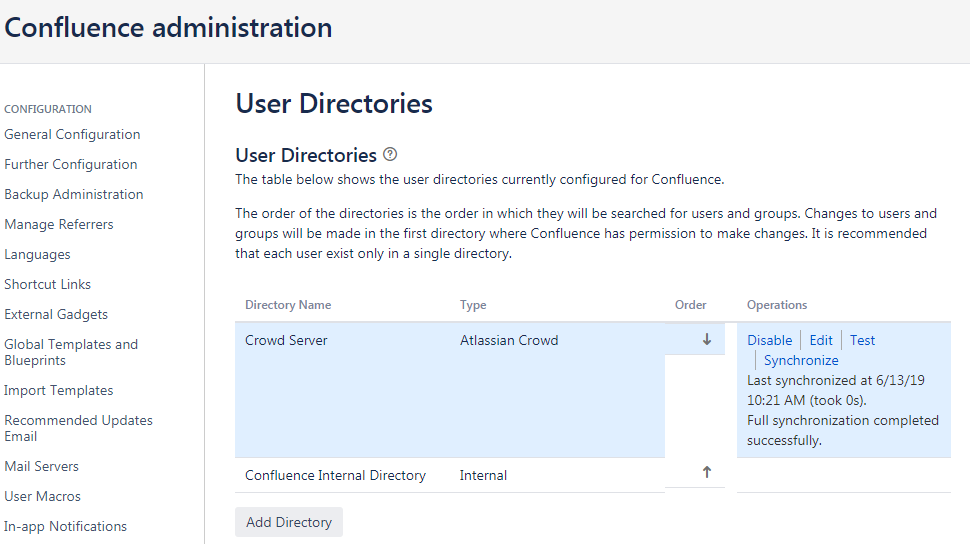
Test the settings and save them.
Now change the order of the user directories. The Crowd directory has to be on first position and synchronize the directory.
Add permissions
The last step is to configure the permissions for the OpenDevStack groups.
Open the User management in the Confluence administration.
To enter the administration, you have to verify you have admin rights with the password for your admin user.
Click the Global Permissions entry at the left in the USERS & SECURITY section.
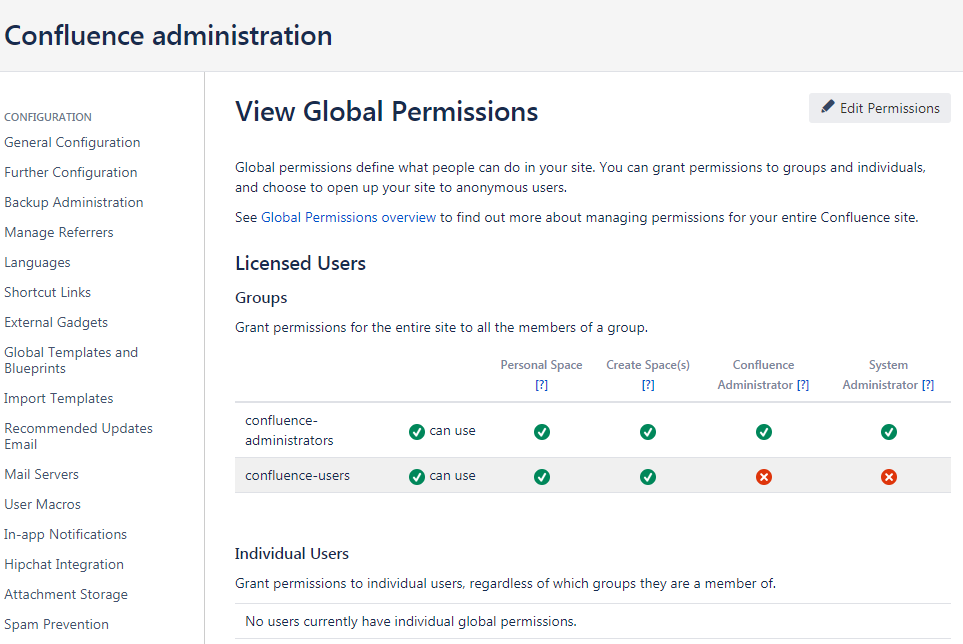
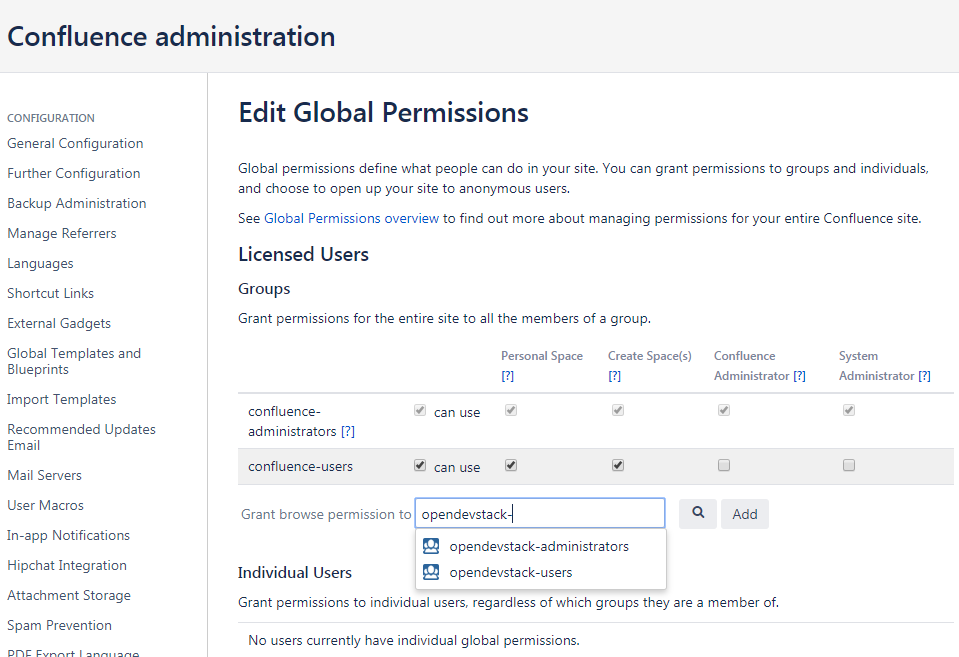
Now choose Edit Permissions and add the OpenDevStack groups with the Input field in the groups section.
Check the checkboxes, so the OpenDevStack groups have the same permissions the local confluence groups have.
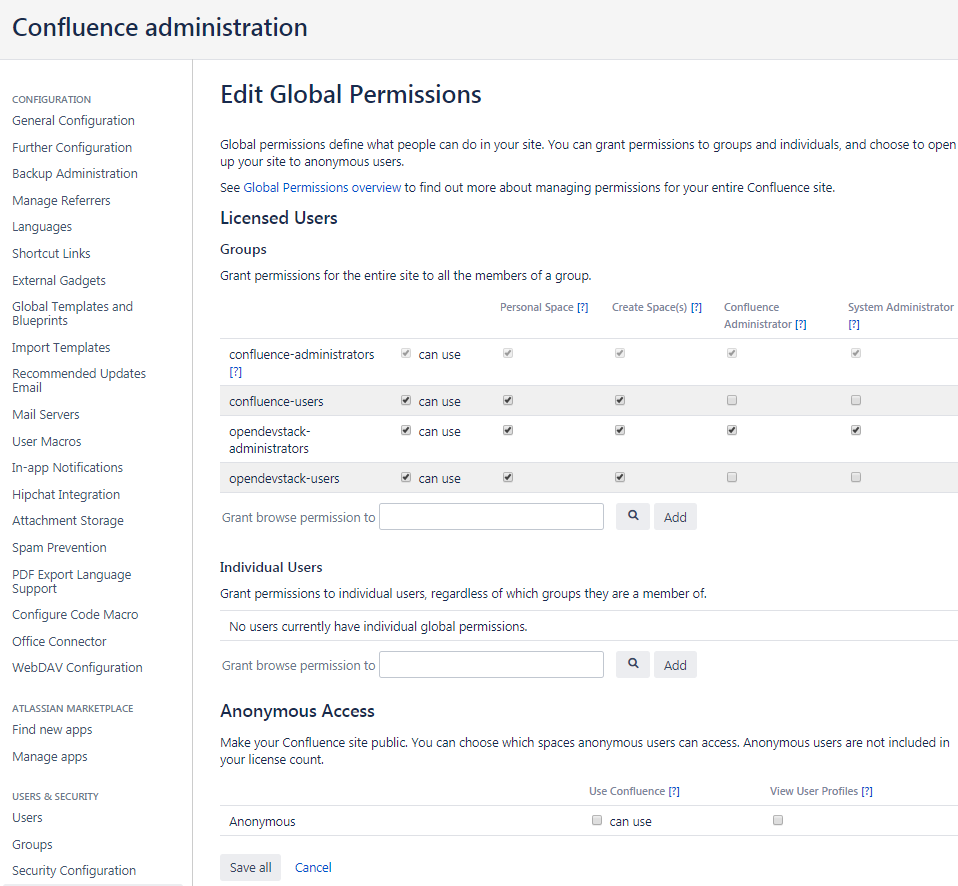
Click Save all to persist the permissions.
Prepare local OpenDevStack environment
After the configuration of the Atlassian tools has been done, it’s time to continue with the preparation oft the OpenDevStack environment. In this step the basic configuration for the OpenShift cluster takes place, as well as the installation of Sonarqube, Nexus3 and the Provisioning application. In addition Rundeck will be prepared automatically as far as possible.
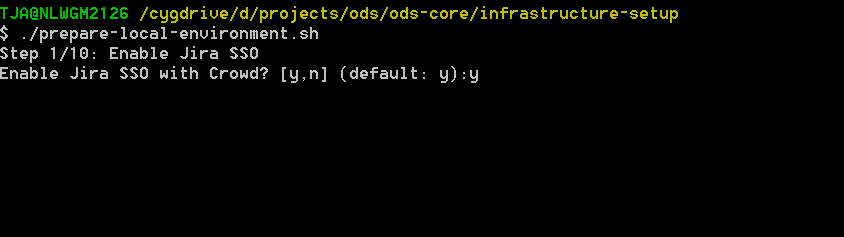
Navigate to the ods-core/infrastructure-setup/scripts directory on your local machine and execute the script
prepare-local-environment.sh

Now you will have to decide, which configuration should be done. In a first time installation you will have to keep the defaults. For further customization there will be an additional guide.
Important; The preparation script also activates SSO in Confluence and Jira. After the activation has been done a login with the local administrator credentials is no longer possible!
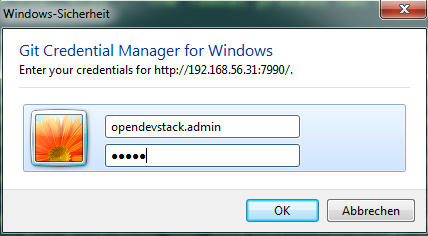
During the mirroring of the local repositories to your Bitbucket instance, it is possible, that you will be asked for credentials.
Here you have to enter the credentials for your loacl Crowd administrator or the cd_user credentials.
After the repository mirroring you may setup project branch permissions in Bitbucket, if the production branch should be guarded against direct merges except through admins.
The subsequent paragraphs explain the installation and configuration content for Nexus3, Sonarqube, Rundeck and the Provisioning application.
Nexus3
Nexus3 will be installed automatically, if you have confirmed the installation in the prepare script.
After the installation Nexus3 will be accessible at http://nexus-cd.192.168.56.101.nip.io/
You are able to login with the default credentials for Nexus3 admin admin123.
During installation various resources will be created automatically. You will find their description in the subsequent paragraphs.
Blob stores
In the automated installation the following blob stores will be created
| Type | Name | Path |
|---|---|---|
File |
candidates |
/nexus-data/blobs/candidates |
File |
releases |
/nexus-data/blobs/releases |
File |
atlassian_public |
/nexus-data/blobs/atlassian_public |
Repositories
This table lists the repositories created automatically.
| Name | Format | Type | Online | Version policy | Layout policy | Storage | Strict Content Type Validation | Deployment policy | Remote Storage | belongs to group |
|---|---|---|---|---|---|---|---|---|---|---|
candidates |
maven2 |
hosted |
checked |
Release |
Strict |
candidates |
checked |
Disable-redeploy |
none |
|
releases |
maven2 |
hosted |
checked |
Release |
Strict |
releases |
checked |
Disable-redeploy |
none |
|
npmjs |
npm |
proxy |
checked |
default |
checked |
|||||
atlassian_public |
maven2 |
proxy |
checked |
Release |
Strict |
atlassian_public |
checked |
Disable-redeploy |
https://maven.atlassian.com/content/repositories/atlassian-public/ |
|
jcenter |
maven2 |
proxy |
checked |
Release |
Strict |
default |
checked |
Disable-redeploy |
maven-public |
|
sbt-plugins |
maven2 |
proxy |
checked |
Release |
permissive |
default |
unchecked |
Disable-redeploy |
ivy-releases |
|
sbt-releases |
maven2 |
proxy |
checked |
Release |
permissive |
default |
unchecked |
Disable-redeploy |
ivy-releases |
|
typesafe-ivy-releases |
maven2 |
proxy |
checked |
Release |
permissive |
default |
unchecked |
Disable-redeploy |
ivy-releases |
|
ivy-releases |
maven2 |
group |
checked |
Release |
permissive |
default |
unchecked |
Disable-redeploy |
||
pypi-all |
pypi |
group |
checked |
default |
pypi-proxy |
|||||
pypi-proxy |
pypi |
proxy |
checked |
default |
User and roles
During installation the following user will be created.
| Name | Password |
|---|---|
developer |
developer |
The user will get the opendevstack-developer role listed below.
| Role ID | Role name | Role description |
|---|---|---|
opendevstack-developer |
OpenDevStack-Developer |
Role for access from OpenDevStack |
This role has the following privileges:
| Privilege |
|---|
nx-repository-admin-maven2-candidates-browse |
nx-repository-admin-maven2-candidates-edit |
nx-repository-admin-maven2-candidates-read |
nx-repository-view-maven2-- |
nx-repository-view-maven2-candidates-* |
nx-repository-view-npm-- |
The account created is used to authenticate against Nexus3, anonymous access is disabled.
Sonarqube
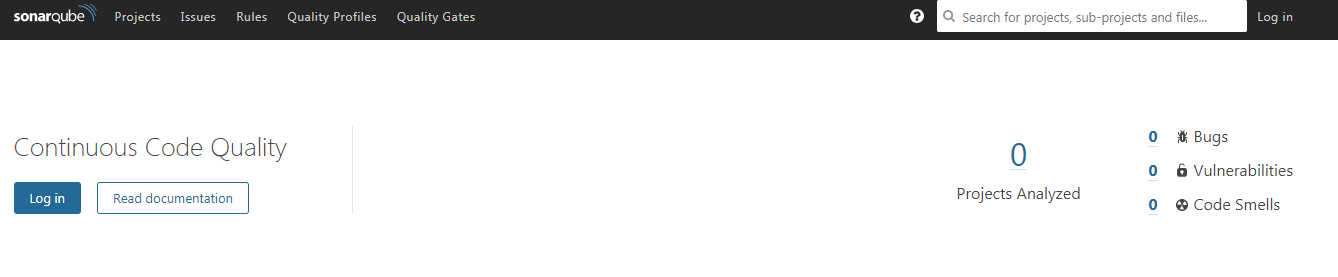
By default Sonarqube will be installed with the preparation script.
You will have to pass a valid authentication token for Sonarqube to the OpenShift templates, so the script will pause as soon as Sonarqube is available.

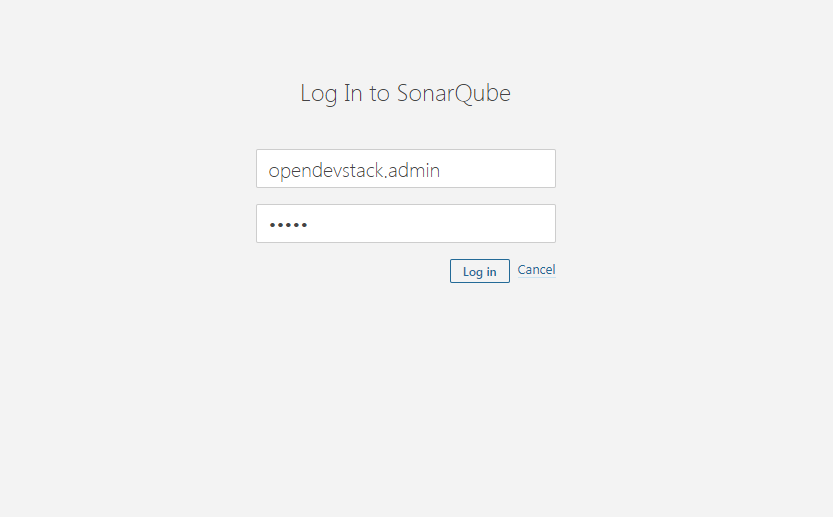
Login with your Crowd credentials.
Now open your personal account settings.
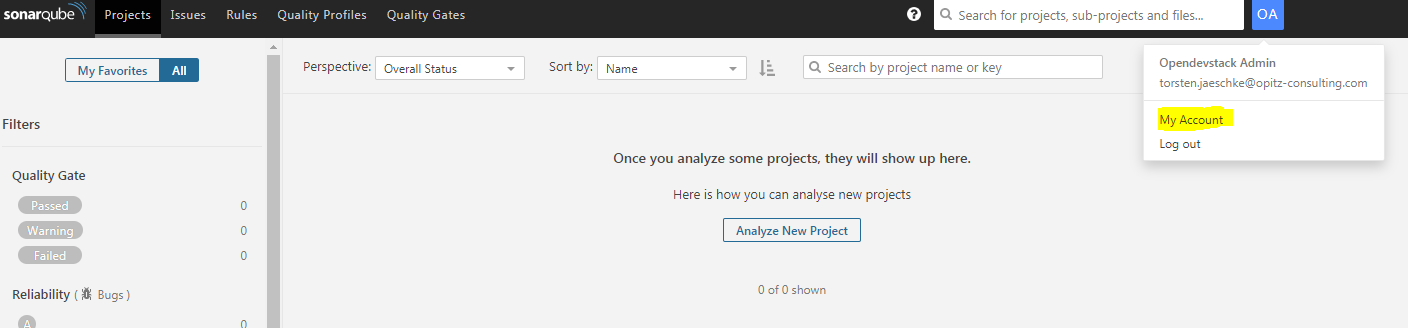
Generate a token in the Security section.
Copy the token value to the input of the preparation script and follow the instructions. The token will be processed and integrated in the templates for future builds.
Prepare Jenkins slave docker images
In additon to the base Jenkins images you have the option to build additional Jenkins slave images.
To do so, just type y instead of typing n or pressing Enter, if you are asked, if you want to install the additional slave images.

Rundeck configuration
After the preparation script execution, you will have to configure some values in Rundeck.
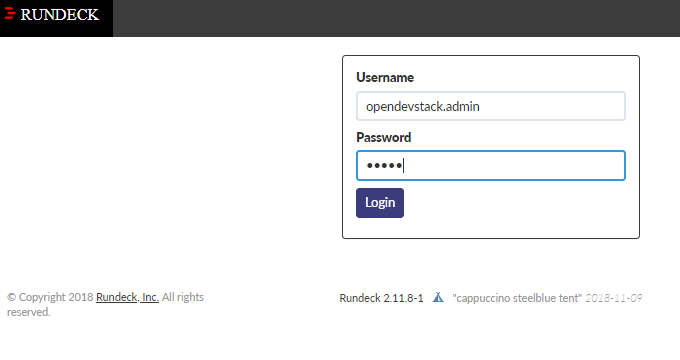
Access Rundeck at http://192.168.56.31:4440/
Login with your Crowd credentials.
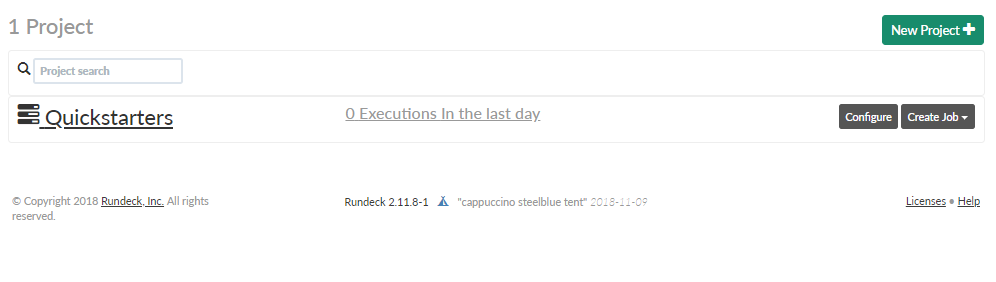
Now choose the Quickstarters project.
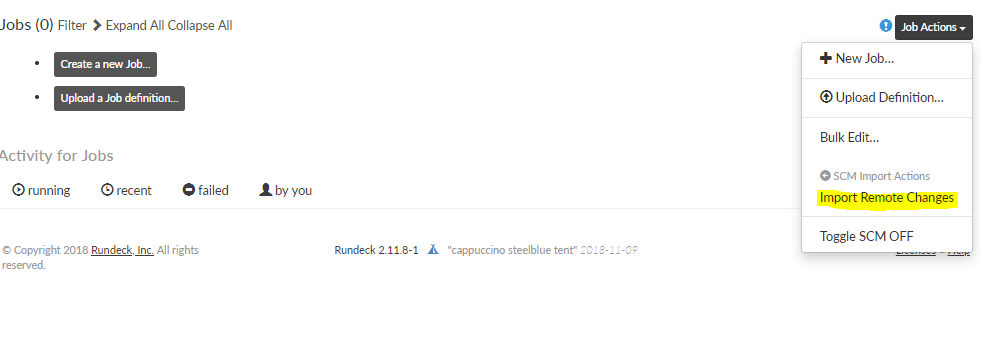
Open the Job Actions button on the right and Import Remote Changes
Click Import
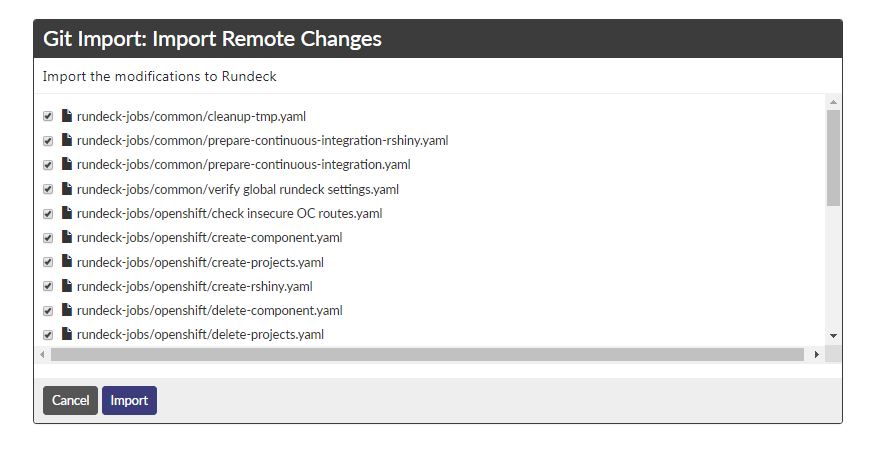
Now you should see the imported jobs.
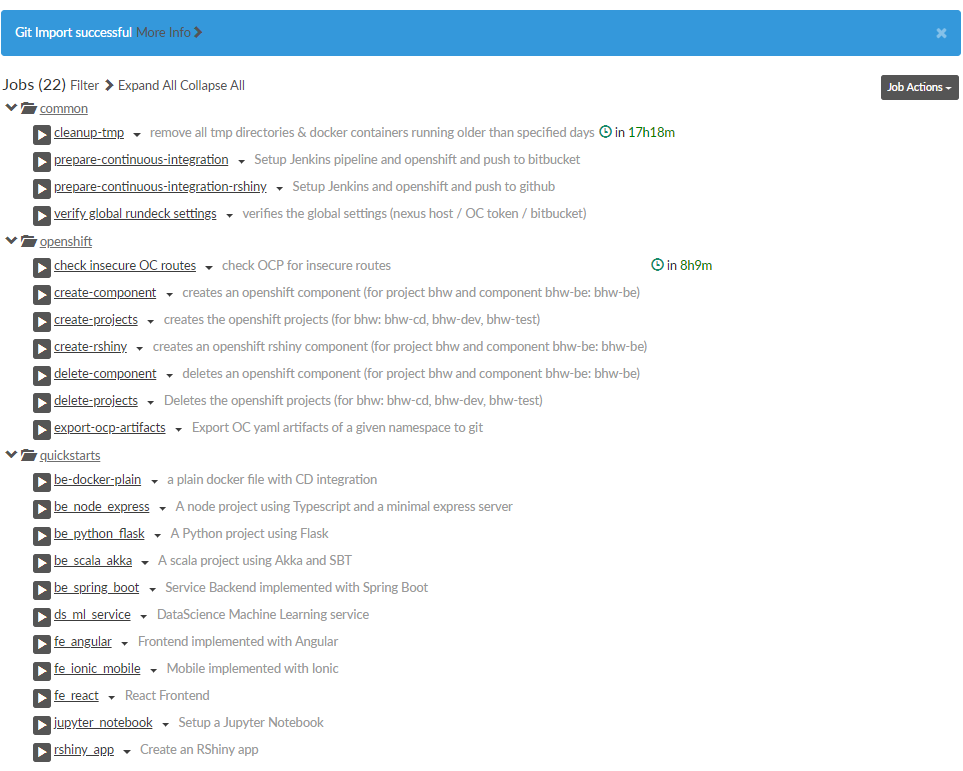
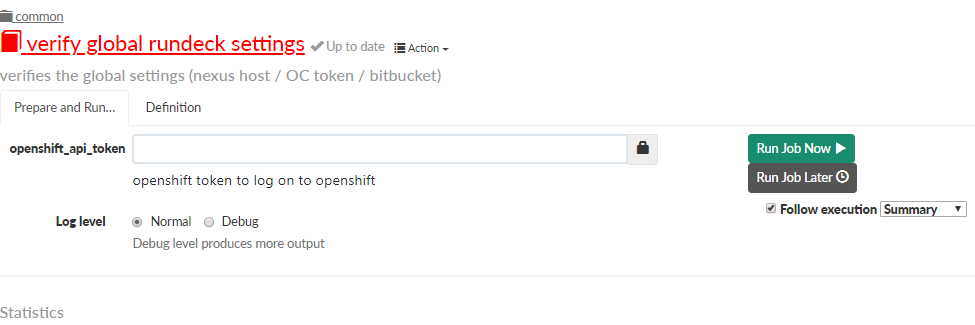
Choose the verify global rundeck settings job and execute it to verify that Rundeck has all necessary data.
Provisioning application
##Run from OpenShift The Provisioning application has been installed with the environment preparation script and is accessible via
There is no further configuration needed.
If the application is not available, you will have to proof in OpenShift, if there have been any errors during the installation.
Run from IDE
Open the cloned provision application in your favorite IDE
If you run the application from your IDE, you will have to provide some addional informations.
In case you want to use your local Nexus, you will have to create a gradle.properties file in the ods-provisioning-app project to provide the Nexus credentials, because we disabled anonymous access.
nexus_url=http://nexus-cd.192.168.56.101.nip.io
nexus_user=developer
nexus_pw=developer
You also have to ensure the Nexus certificate is integrated in the keystore of the JDK the IDE uses.
If you don’t want to use the internal Nexus and run the application from your IDE, you will have to provide a gradle.properties file with the following content:
no_nexus=trueAfter startup via the IDE the application is available at http://localhost:8080/
You can login in with the Crowd admin user you set up earlier.
Add shared images
OpenDevStack provides shared images used accross the stack - like the authproxy based on NGINX and lua for crowd
In order to install, create a new project called shared-services
Make the required customizations in the ods-configuration under
and run tailor update inside ods-core\shared-images\nginx-authproxy-crowd:
and start the build: oc start-build -n shared-services nginx-authproxy.
Try out the OpenDevStack
After you have set up your local environment it’s time to test the OpenDevStack and see it working. Open the Provisioning application in your web browser and login with your crowd credentials.
Provision your first project and have a look at your project in the Atlassian tools and OpenShift.